

How I Built a Budgeting Web API with Django
This is a walkthrough of how I built the API for budgetME using Django Rest Framework


Table of contents
- Introduction
- What is Django and why should we use it?
- Creating the directory for our API
- Setting up your Django project
- Connecting your Django project to Postgresql
- Implementing Environment Variables in Django
- Creating our API endpoints with Django Rest Framework
- API Documentation with Swagger UI/Redoc
- Conclusion (TLDR)
Introduction
I built budgetMe because I wanted a simple way to keep track of all my expenses and income and visualize them, but most budgeting apps were unnecessarily over-complicated or too expensive. So, I built BudgetMe with Django Rest Framework and React. I wrote more about why and the technology behind it here: thinkpanda.hashnode.dev/introducing-budgetm..
However, in this article, we are going to learn how I created the Budgeting API with Django rest framework with full CRUD(Create, Read, Update, and Destroy or Delete) operations and JWT authentication. We are also going to learn how to add automated documentation to our API with swagger and redoc and test our endpoints using postman.
What is Django and why should we use it?
Django is a high-level powerful python web framework that enables you to build web applications faster without having to worry about the redundancies that come with building large systems. Django was created by a web team who were responsible for creating and maintaining newspaper websites. After creating several sites, the team began to factor out and reuse lots of common code and design patterns. This common code evolved into a generic web development framework, which was open-sourced as the "Django" project in July 2005. Django has grown to become one of the most popular web frameworks because of its completeness, scalability, maintainability and security. So, what are we waiting for? Let us get started with building our Rest API with Django! 😁

Creating the directory for our API
Go into your terminal or Powershell and run the following commands :
cd documents

// create a folder for your project
mkdir budgetMe

//opens vscode
code.
Setting up your Django project
Installing and activating your virtual environment
// installing the virtual environment
pip install virtualenv

// creating the virtual environment
virtualenv env

// activating the virtual environment (on macOS)
source env/bin/activate

// activating the virtual environment (on windows)
env\Scripts\activate
Installing the project dependencies
- Create a new file called "requirements.txt" and copy all of the project dependencies to it.
asgiref==3.5.2
autopep8==1.6.0
certifi==2022.6.15
charset-normalizer==2.1.0
coreapi==2.3.3
coreschema==0.0.4
dj-database-url==1.0.0
Django==4.0.6
django-cors-headers==3.13.0
django-on-heroku==1.1.2
djangorestframework==3.13.1
djangorestframework-simplejwt==5.2.0
drf-yasg==1.21.3
gunicorn==20.1.0
idna==3.3
inflection==0.5.1
itypes==1.2.0
Jinja2==3.1.2
MarkupSafe==2.1.1
mysqlclient==2.1.1
packaging==21.3
psycopg2-binary==2.9.3
pycodestyle==2.8.0
PyJWT==2.4.0
pyparsing==3.0.9
python-dotenv==0.20.0
pytz==2022.1
requests==2.28.1
ruamel.yaml==0.17.21
ruamel.yaml.clib==0.2.6
six==1.16.0
sqlparse==0.4.2
toml==0.10.2
uritemplate==4.1.1
urllib3==1.26.11
whitenoise==6.2.0
- Install the dependencies
// installs all the dependencies
pip install -r requirements.txt

// shows all the dependencies that have been installed
pip freeze
Starting your Django project
In your project directory run the following command to start your Django project :
django-admin startproject backend
If you followed the instructions properly your file structure should look like this :
budgetMe
    backend/
        backend/
            __init__.py
            settings.py
            urls.py
            asgi.py
            wsgi.py
        manage.py
    env
    requirements.txt
Let's take a look at what the files django-admin startproject created does.
The outer backend/ root directory is the container for your project and can be renamed to anything you like.
manage.py: Manage. py is a command-line utility that lets you interact with your Django project. Runningpython manage.pyshows you all the ways the utility class, manage. py, can interact with your Django project.The inner backend/ directory is the actual python package for your project.
backend/__init__ .py:__init__.pyis an empty file that tells Python that this directory should be considered as a package.backend/settings.py: These are where the settings and configurations for your Django project lie.backend/urls.py: The URL file is used to redirect HTTP requests to the appropriate view based on the request URL.backend/asgi.py: An entry-point for ASGI-compatible web servers to serve your project.backend/wsgi.py: An entry-point for WSGI-compatible web servers to serve your project.
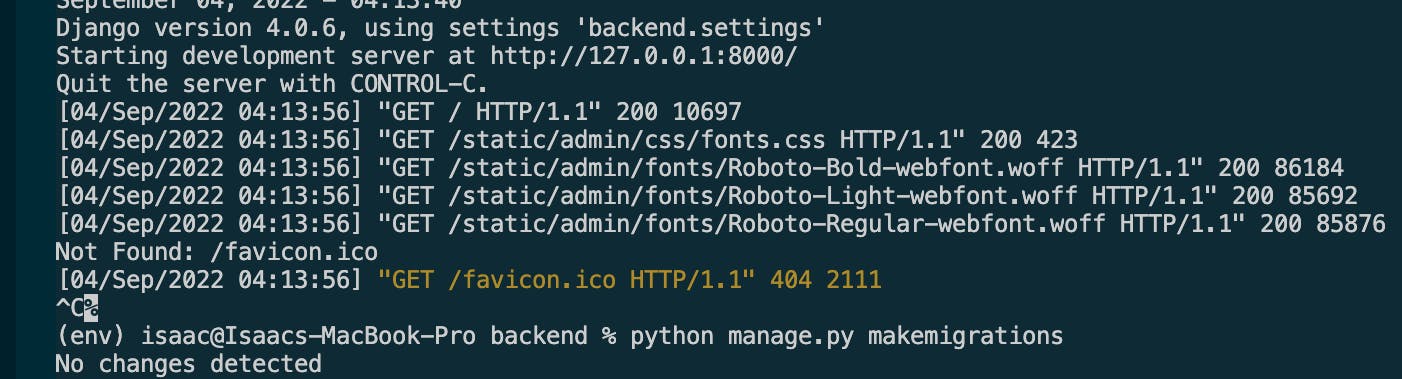
Testing out our installation
Run the following code in your terminal and then copy the URL http://127.0.0.1:8000/ to your browser.
// moves down a directory to where the "manage. py" file is
`cd backend`

// runs the development web server on port 8000
`python manage.py runserver`
$ python3 manage.py runserver
Watching for file changes with StatReloader
Performing system checks…

System check identified no issues (0 silenced).

You have 18 unapplied migration(s). Your project may not work properly until you apply the migrations for app(s): admin, auth, contenttypes, sessions.
Run 'python manage.py migrate' to apply them.
September 02, 2022 - 04:13:40
Django version 4.0.6, using settings 'backend.settings'
Starting development server at http://127.0.0.1:8000/
Quit the server with CONTROL-C.
Once the server is up and running you can view the site by navigating to http://127.0.0.1:8000/ on your web browser, and you should see a page that looks like this :
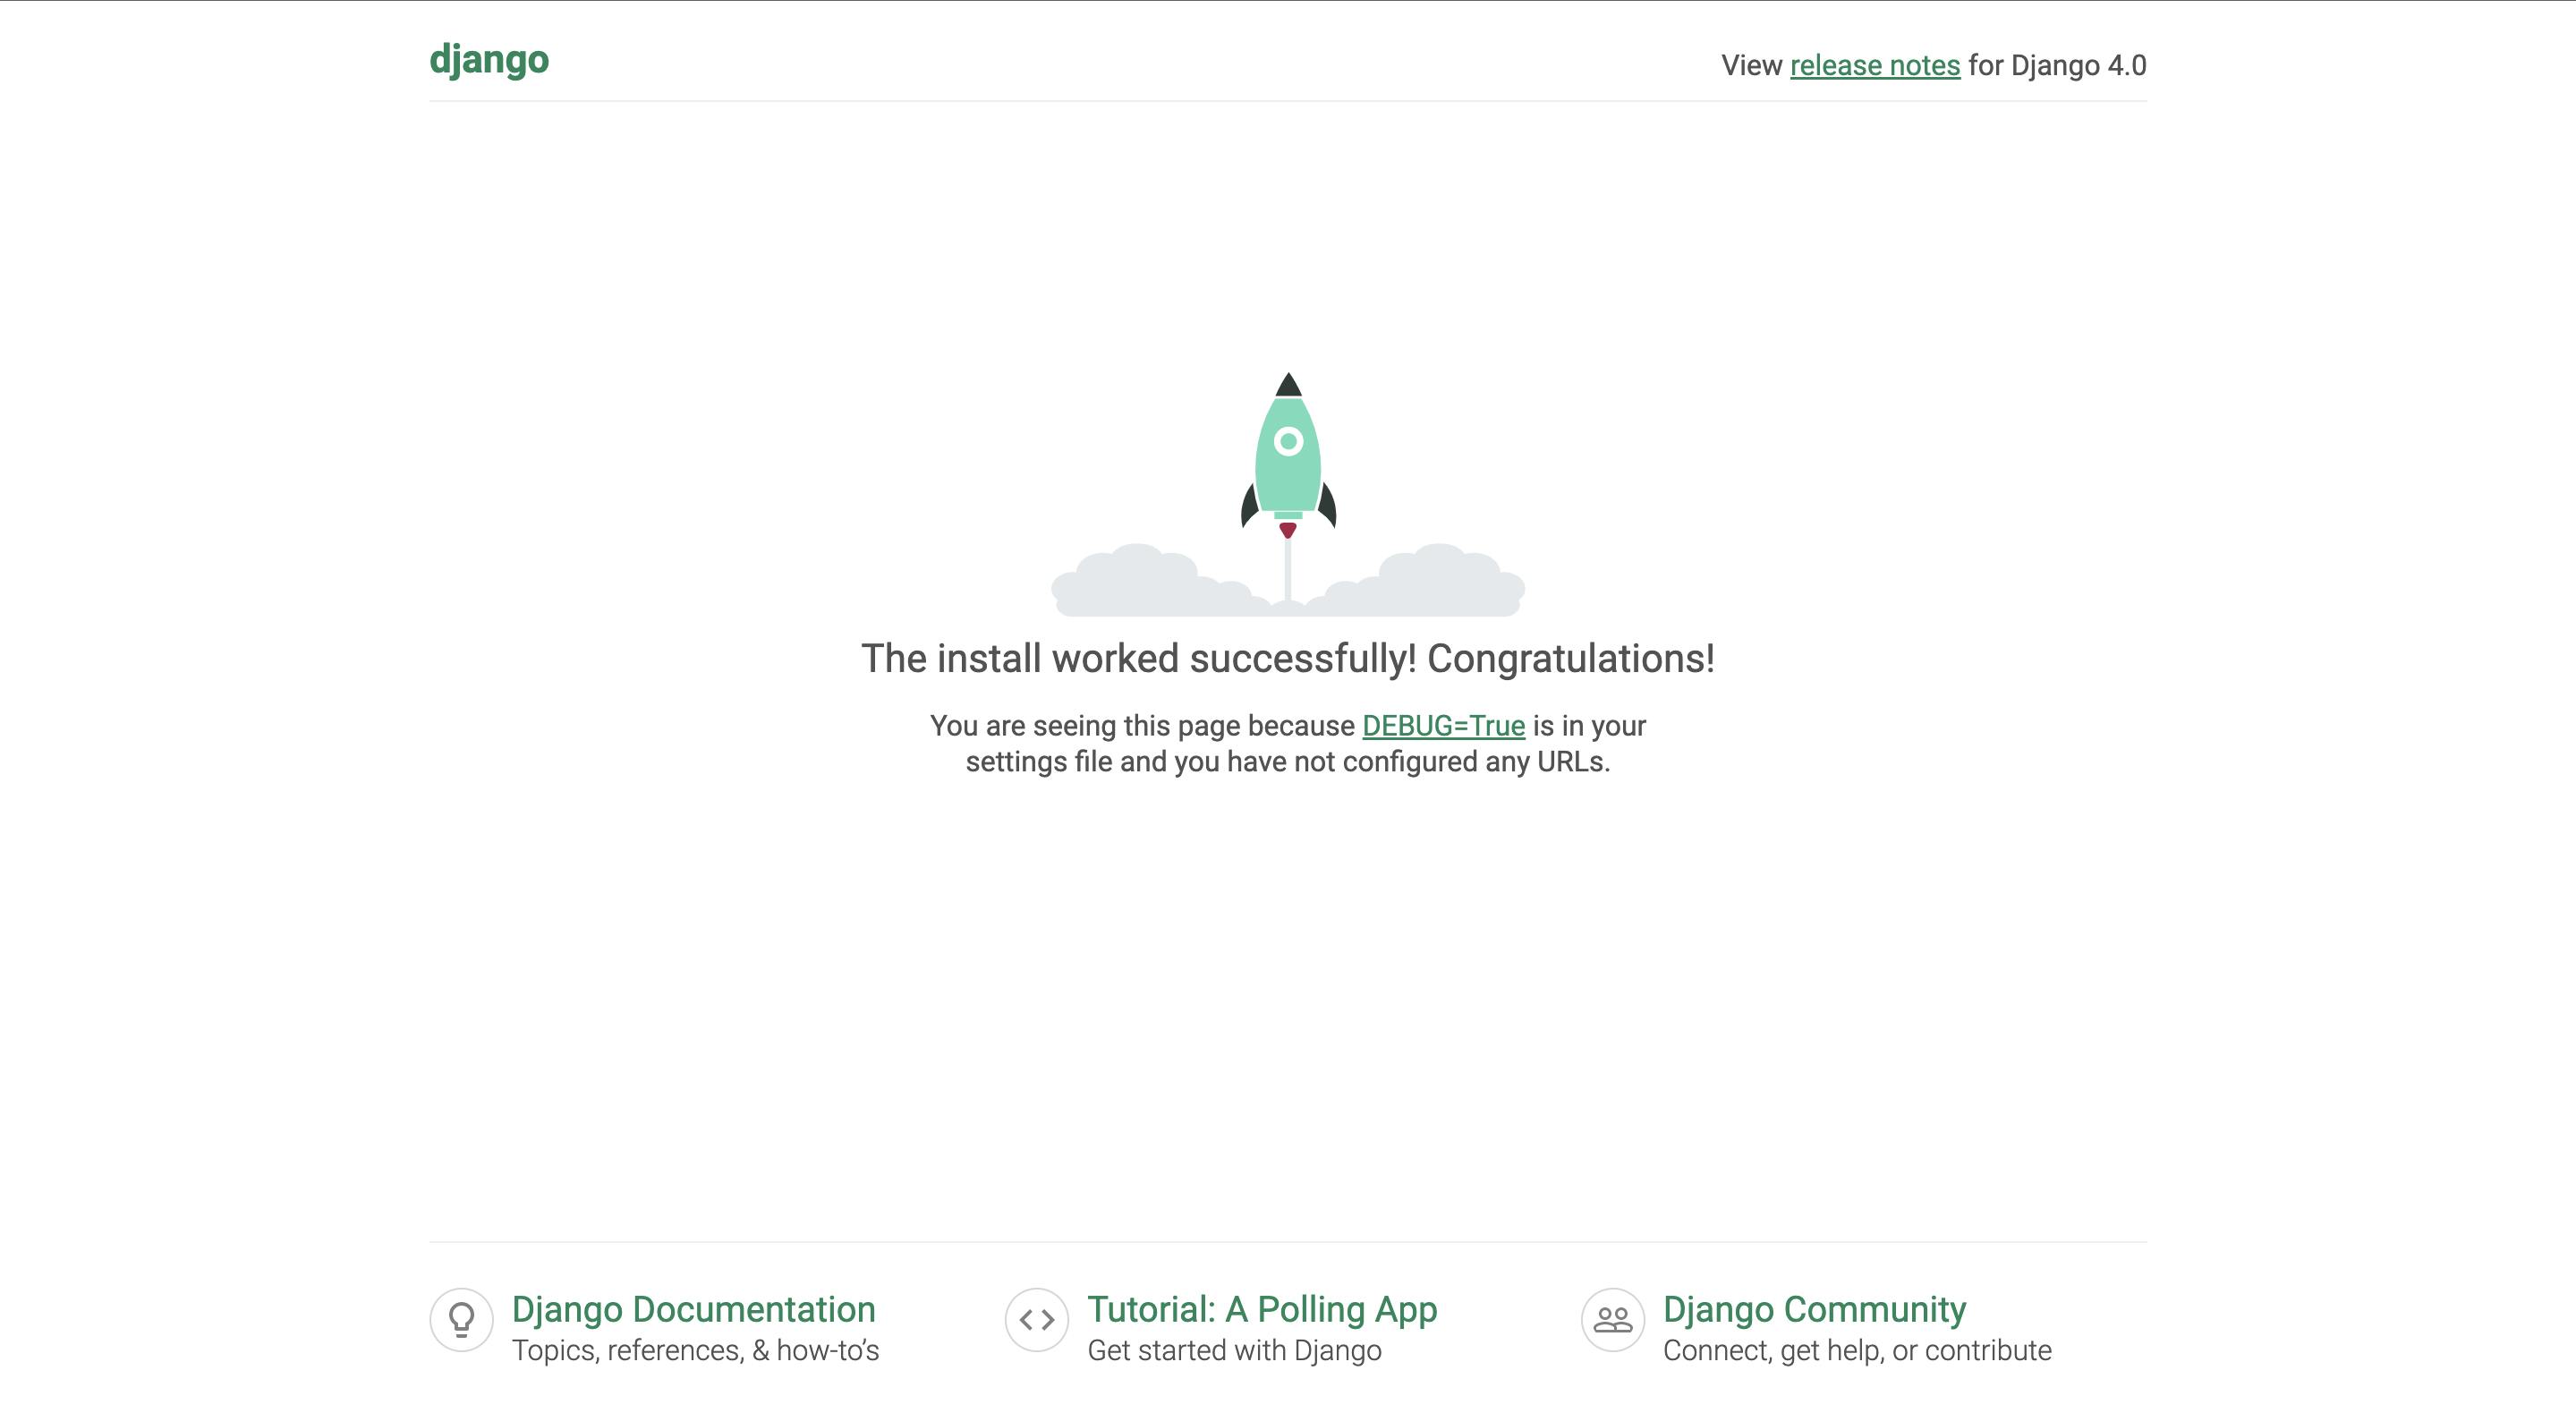
If you saw a page that looks like this, congratulations 🎉 you have successfully installed django.
Connecting your Django project to Postgresql
Why you should not use SQLite for production
By default, SQLite comes with django because of how lightweight ( less than 500KB in size ) it is compared to PostgreSQL ( more than 200MB in size ). However, it comes with a lot of limitations such as poor user management, limited functionalities, and weaker security. These limitations make SQLite a poor production database and PostgreSQL- with better security, user management, and features - a more ideal production database. So, with that in mind let us set up our database server and connect it to our django project.
Downloading and installing postgreSQL
- Go to the official postgreSQL website: postgresql.org/download
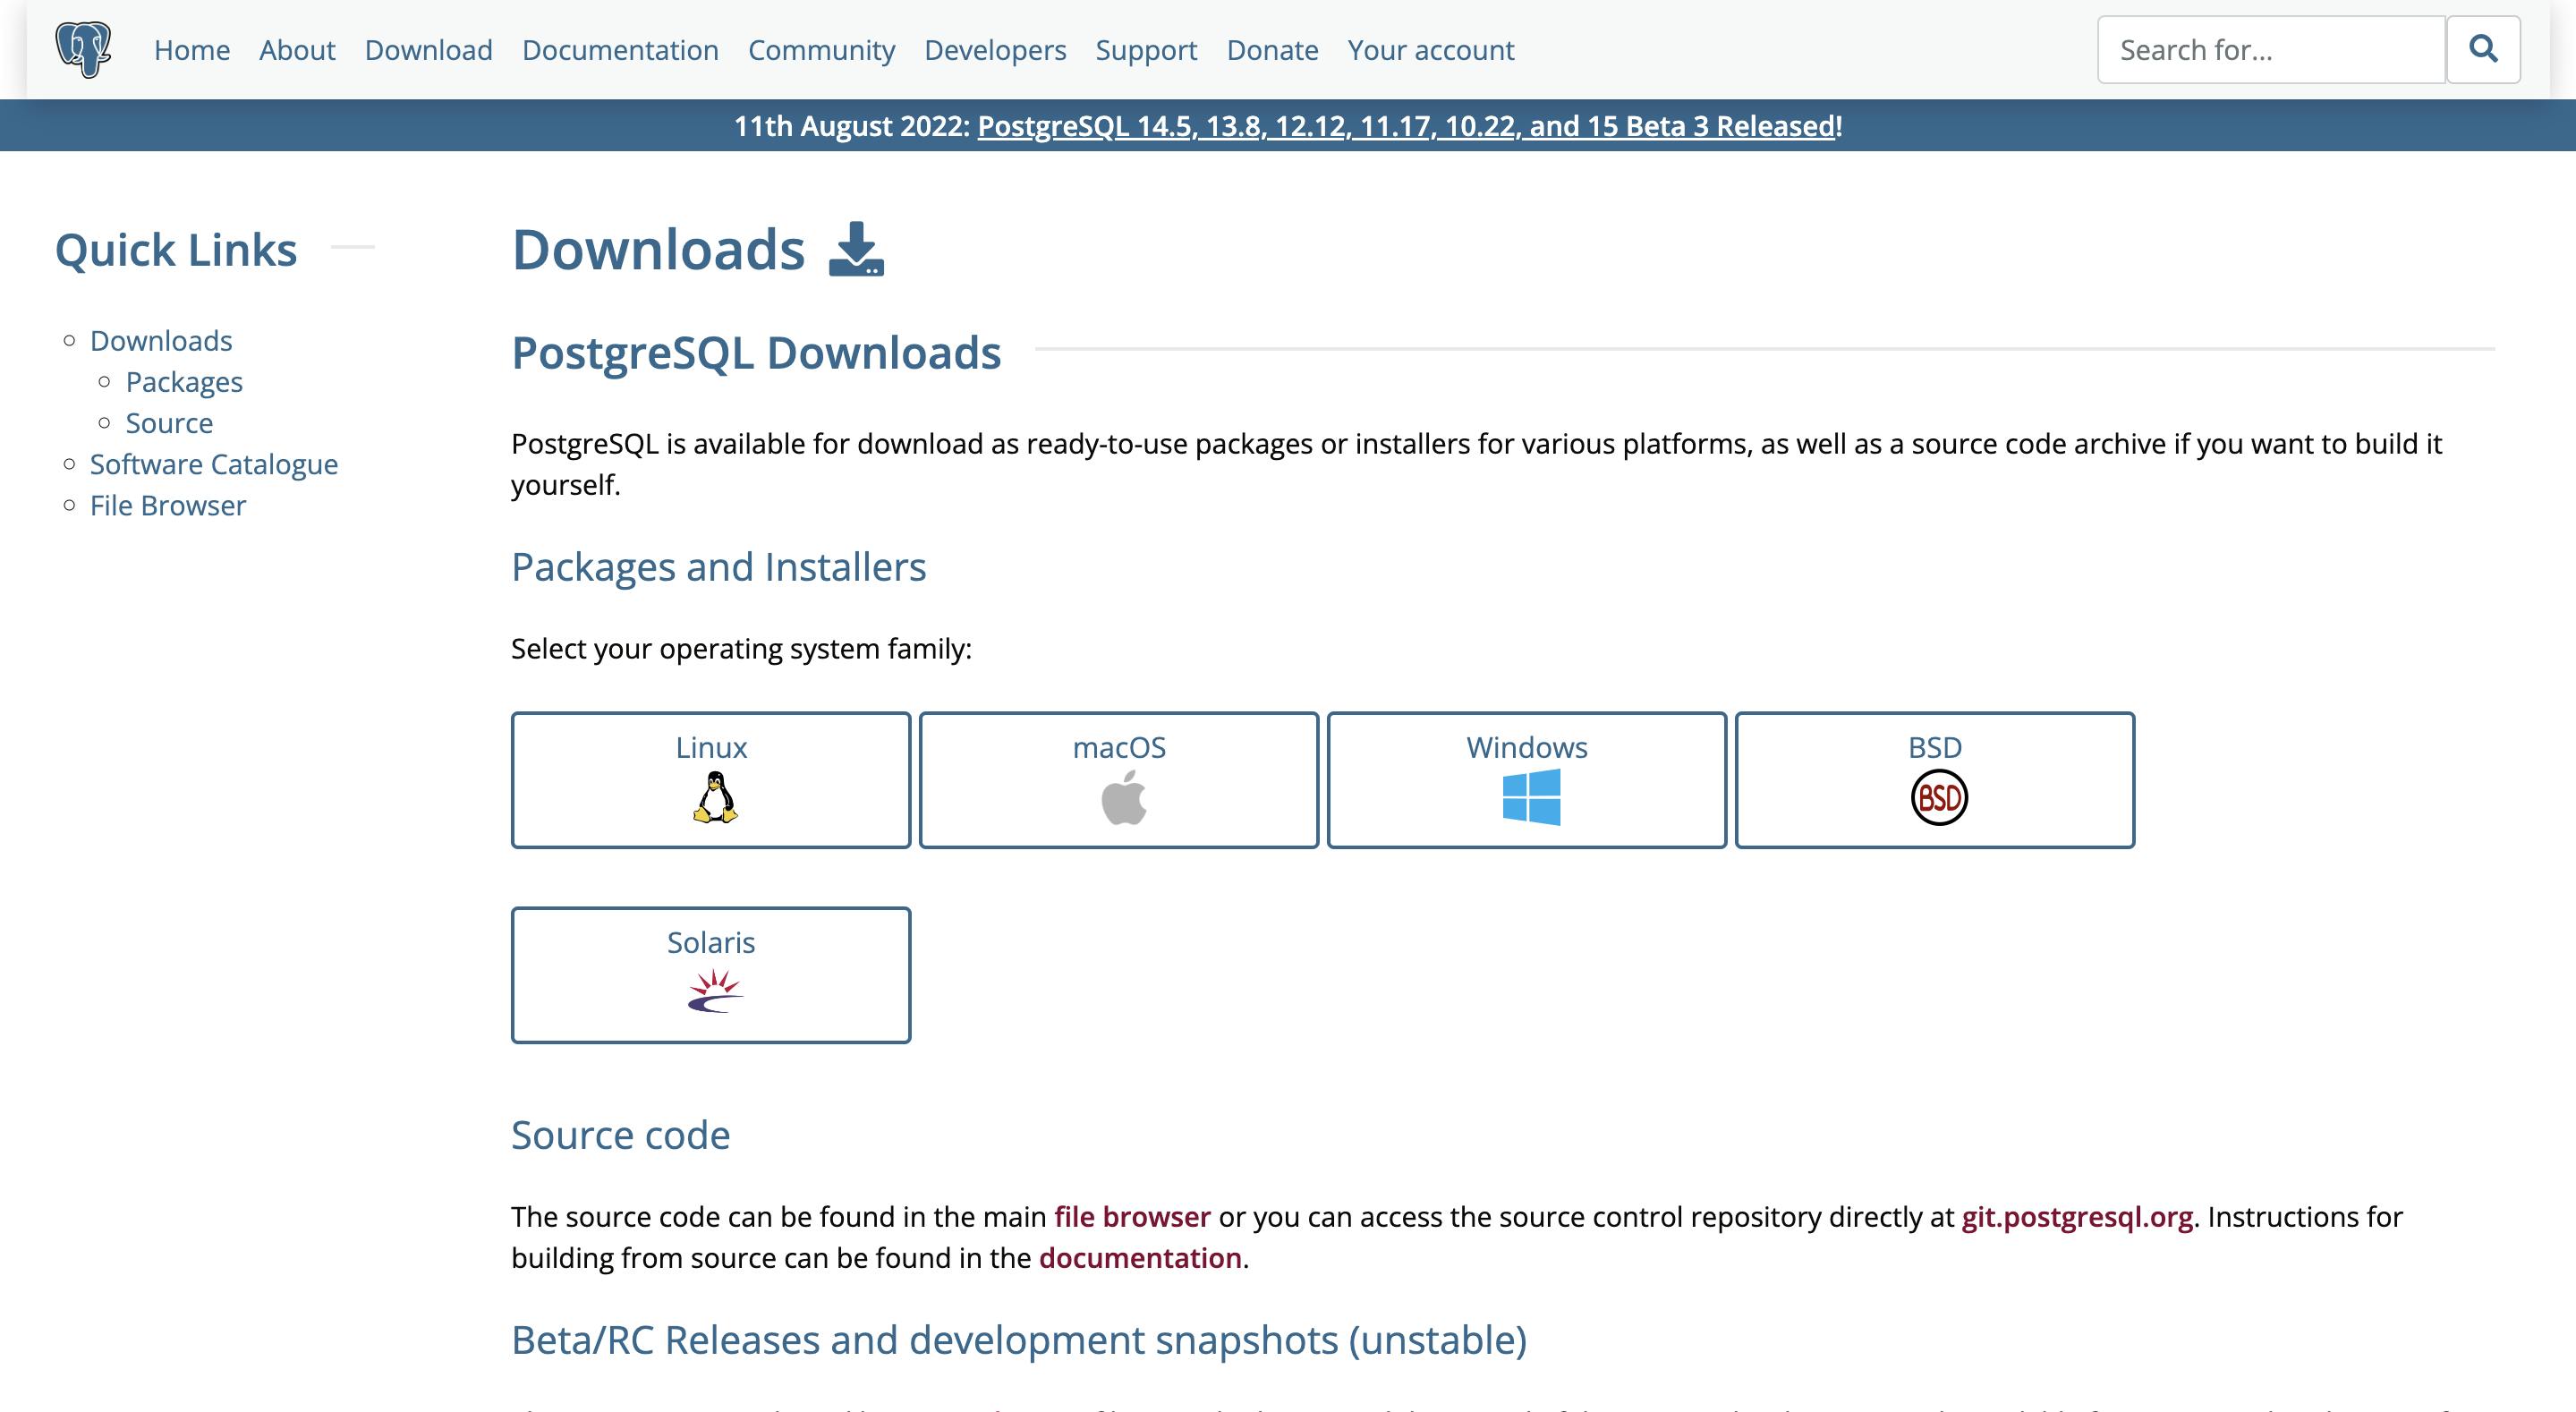
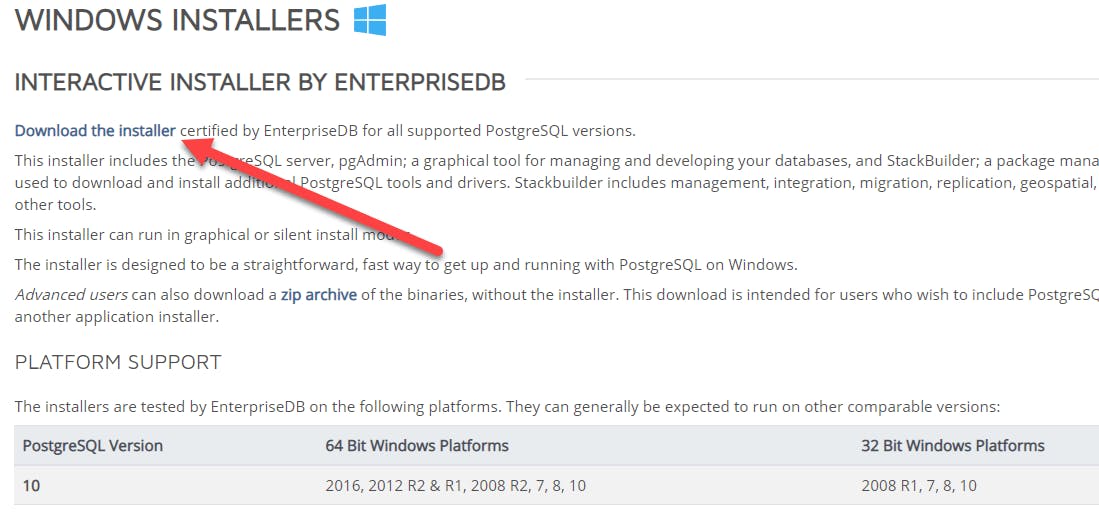
- Select Your operating system family and then click "download the installer"
- Select the latest version, click download and then follow the installation prompts of your OS.
For more information: guru99.com/download-install-postgresql.html
Setting up a database server
open pgAdmin4
Create a new database, name it and then save it.
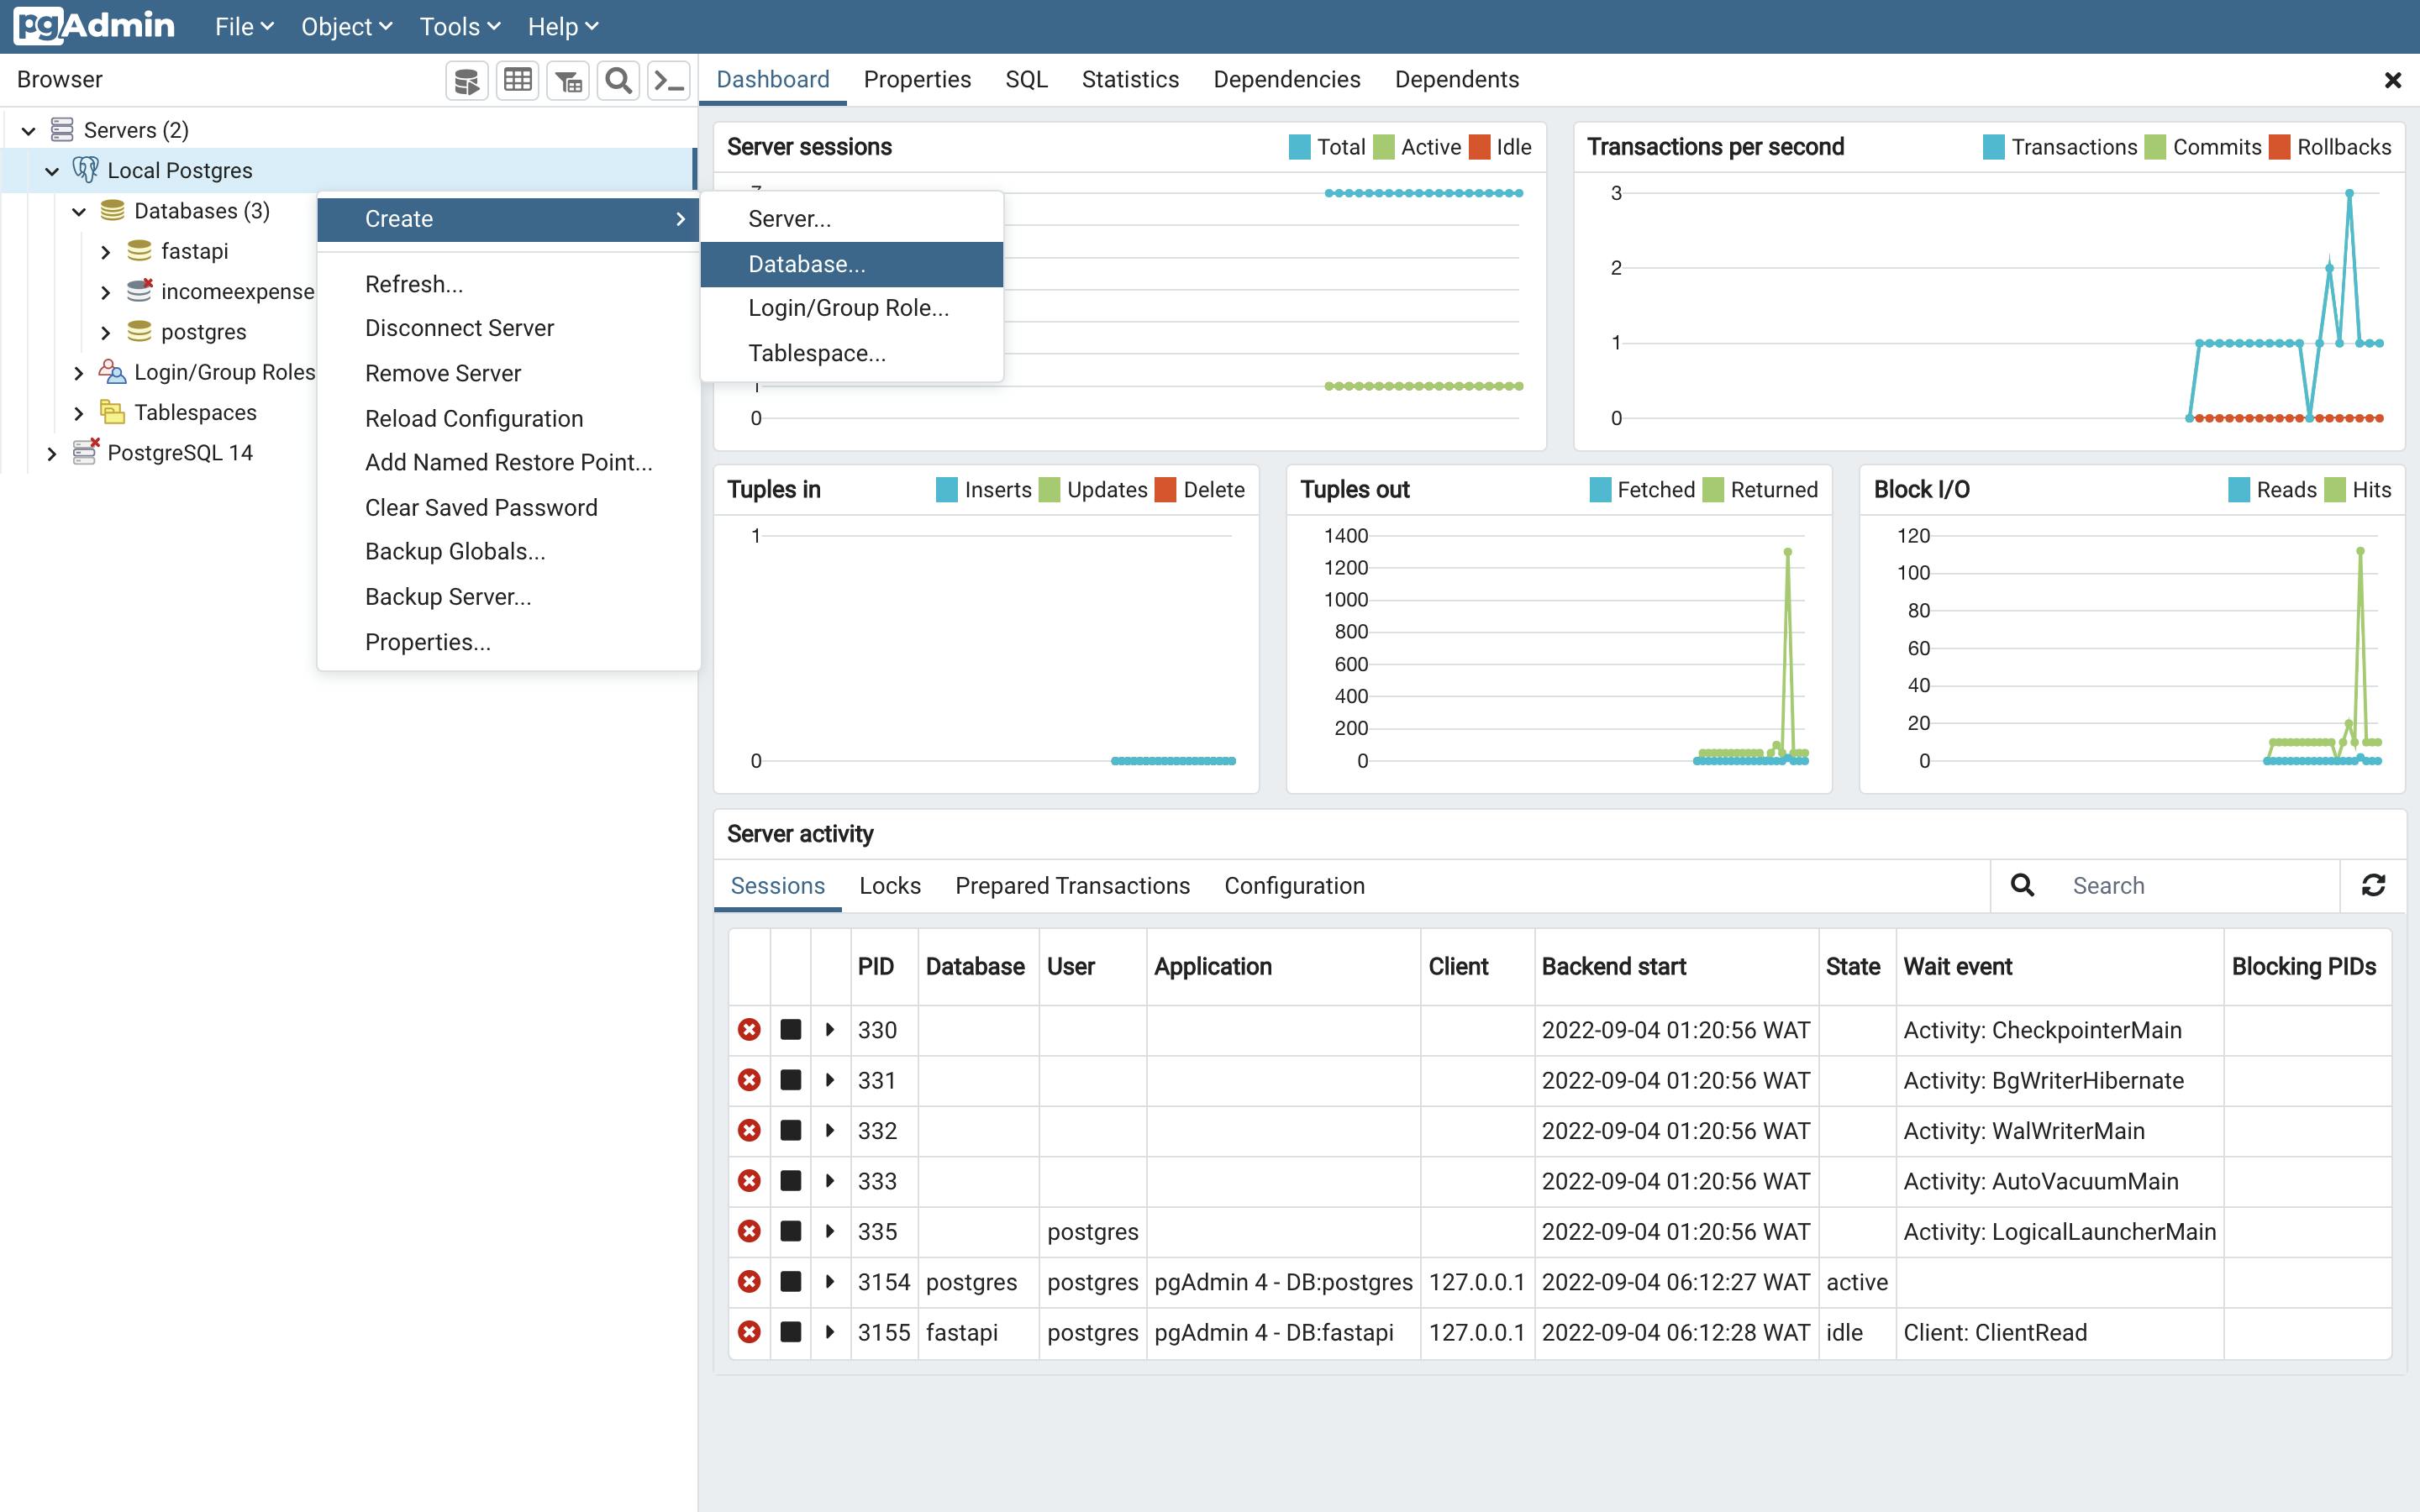
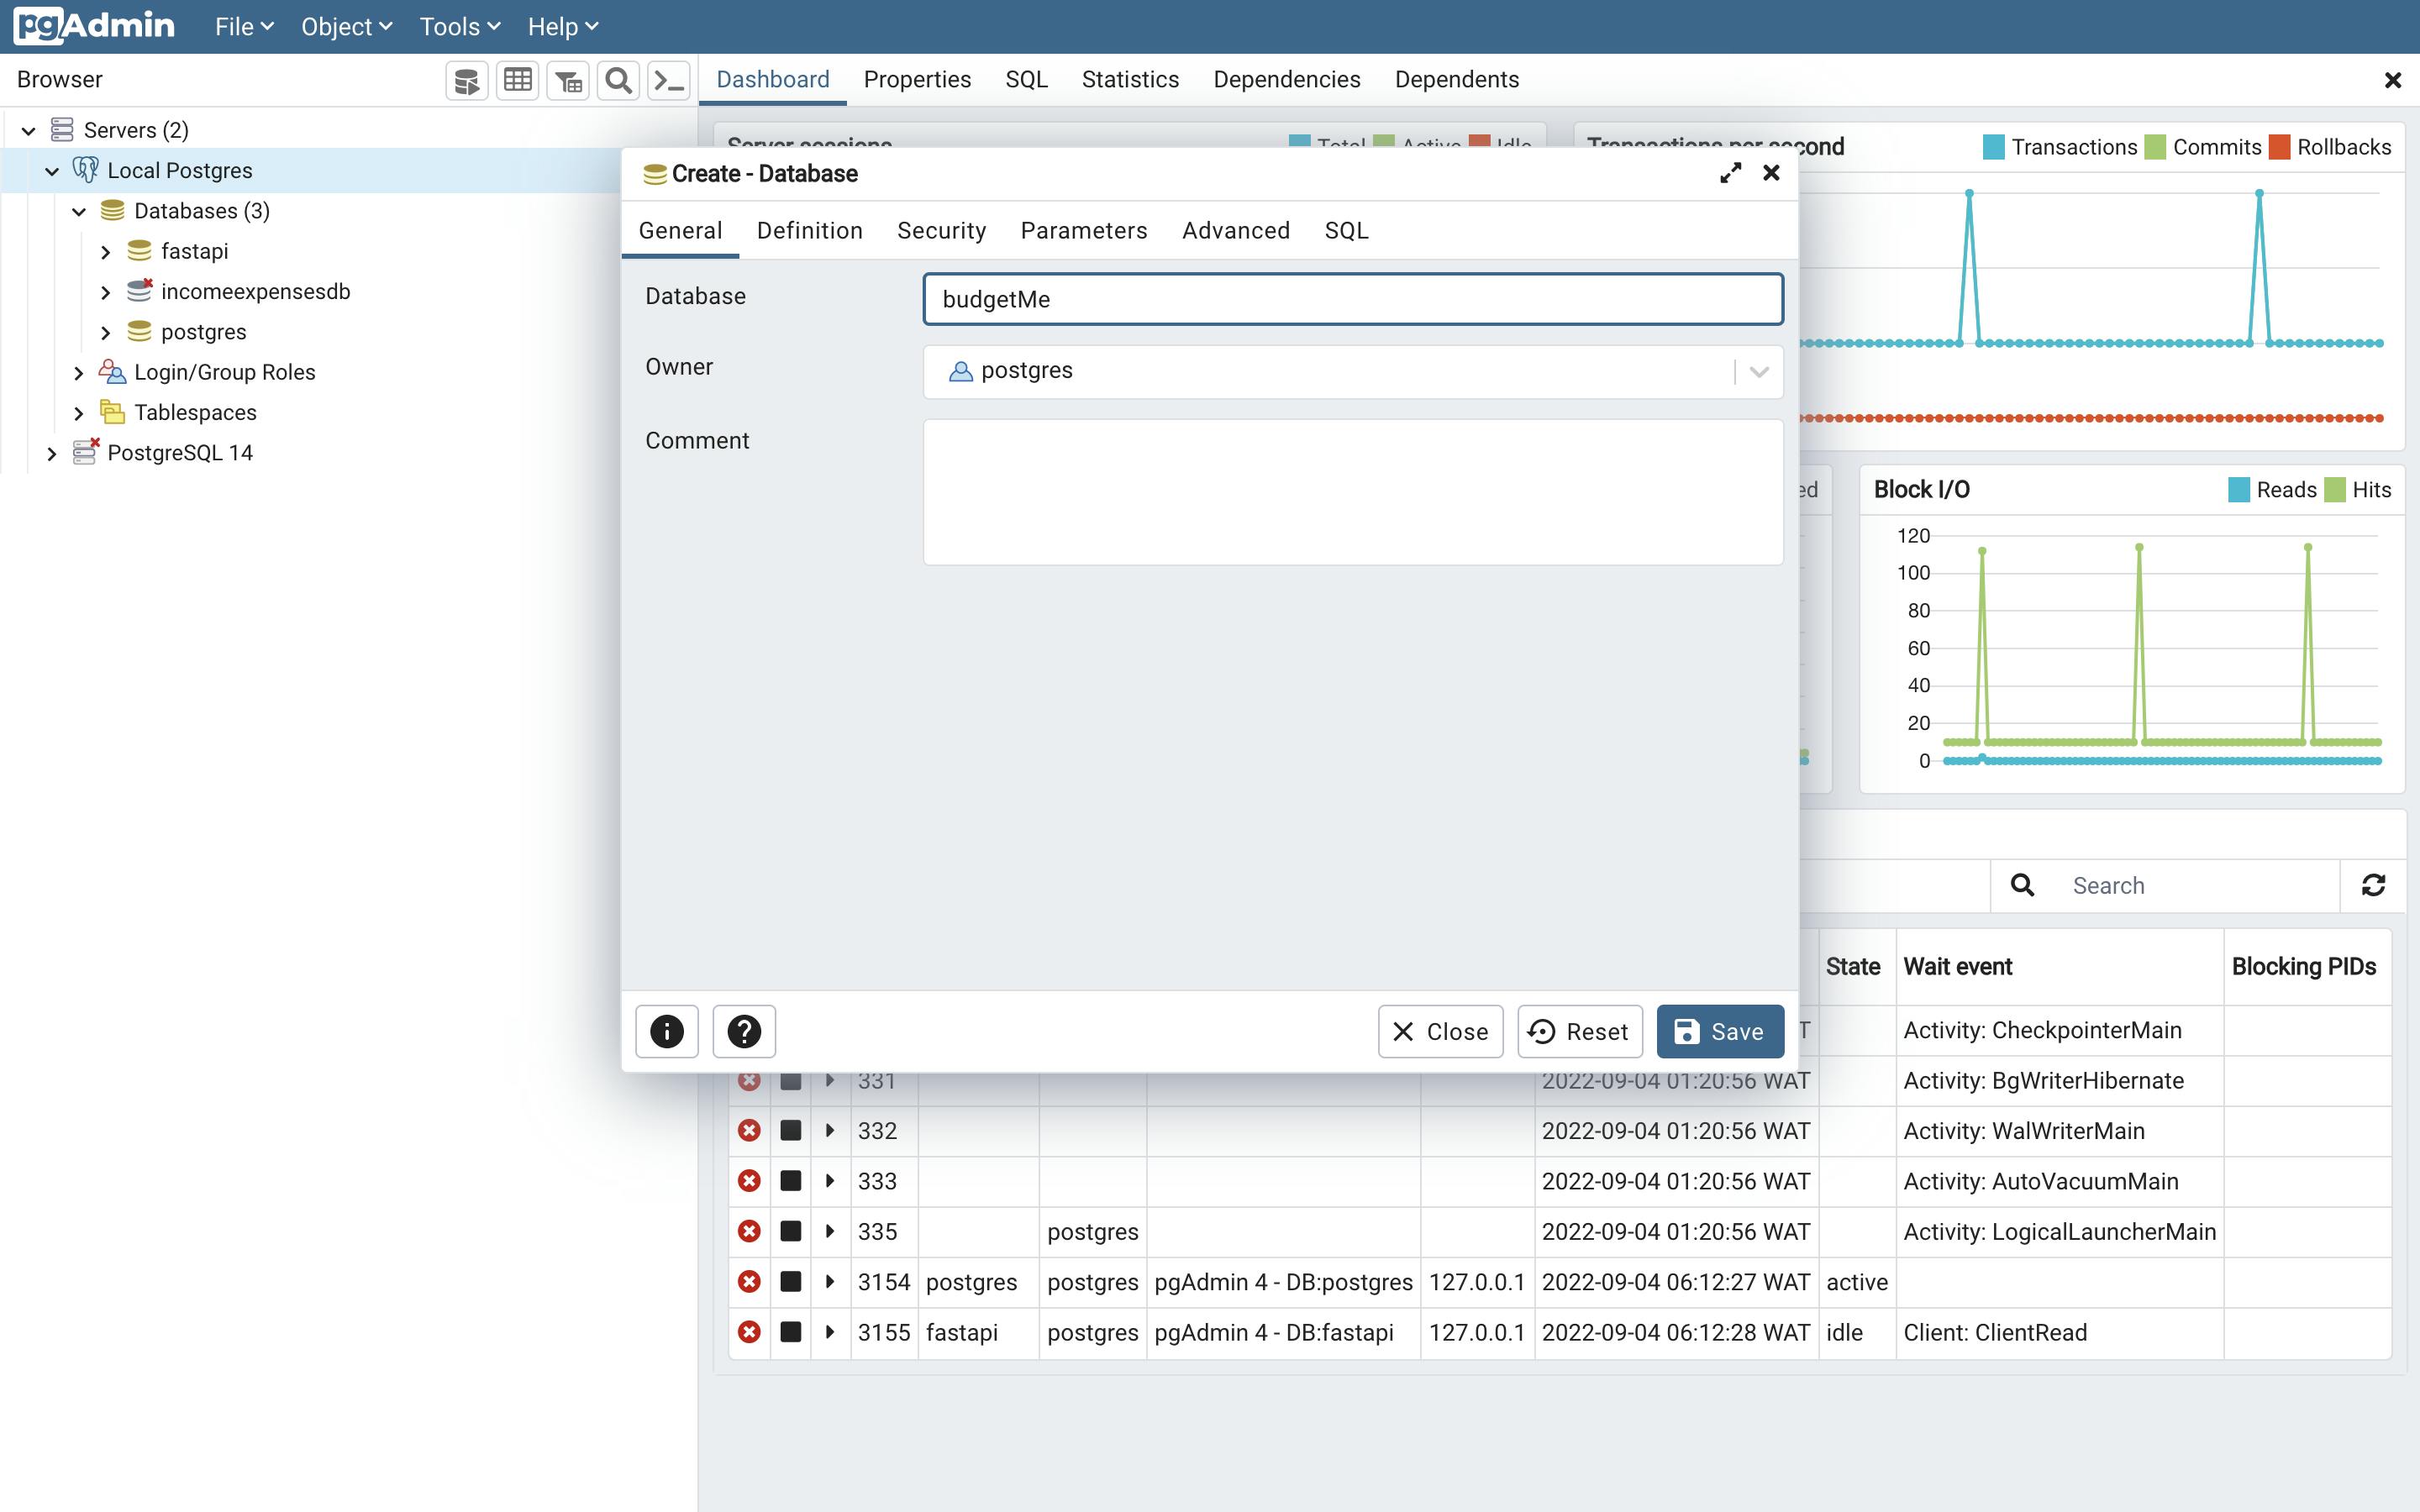
Your postgres database server has been created but the tables are empty right now.
Connecting your database server to your Django project.
To connect our postgreSQL database server to our django project we need to first switch from the default SQLite database. To do so, we need to go to our settings file on line 76 and replace this :
. . .

DATABASES = {
    'default': {
        'ENGINE': 'django.db.backends.sqlite3',
        'NAME': BASE_DIR / 'db.sqlite3',
    }
}
. . .
to this :
. . .

DATABASES = {
    'default': {
        'ENGINE': 'django.db.backends.postgresql_psycopg2',
        'NAME': 'budgetMe',
        'USER': 'postgres',
        'PASSWORD': '<your postgres database password>',
        'HOST': '127.0.0.1',
        'PORT': '5432',
    }
}

. . .
ENGINE: The database engine is the underlying software component that a Database Management System (DBMS) uses to create, read, update, and delete ( CRUD ) data from a database. For PostgreSQL the database engine isdjango.db.backends.postgresql_psycopg2.NAME: This is the name of the database you created in your pgAdmin4.USER: The database username( by default it is postgres ).PASSWORD: The database password.HOST: The Database host( In the development stage it is localhost or your IP Address 127.0.0.1 ).PORT: The port run by the PostgreSQL database (5432).
Migrating the table to the PostgreSQL database
Migrations are django’s way of propagating changes you make to your models (adding a field, deleting a model, etc.) into your postgreSQL database.
- makemigrations: This command is responsible for creating new migrations based on the changes you have made to your model e.g adding new tables, changing a field name, etc. Run the following commands to makemigrations:
// To quit the server
`Control + C`

// To make migrations
`python manage.py makemigrations`
- migrate: This command is responsible for applying and reapplying migrations.
You should think of migrations as a version control system for your database schema. makemigrations is responsible for packaging up your model changes into individual migration files - analogous to commits - and migrate is responsible for applying those to your database. - Django Documentation
Run the following commands to migrate to our database:
python manage.py migrate
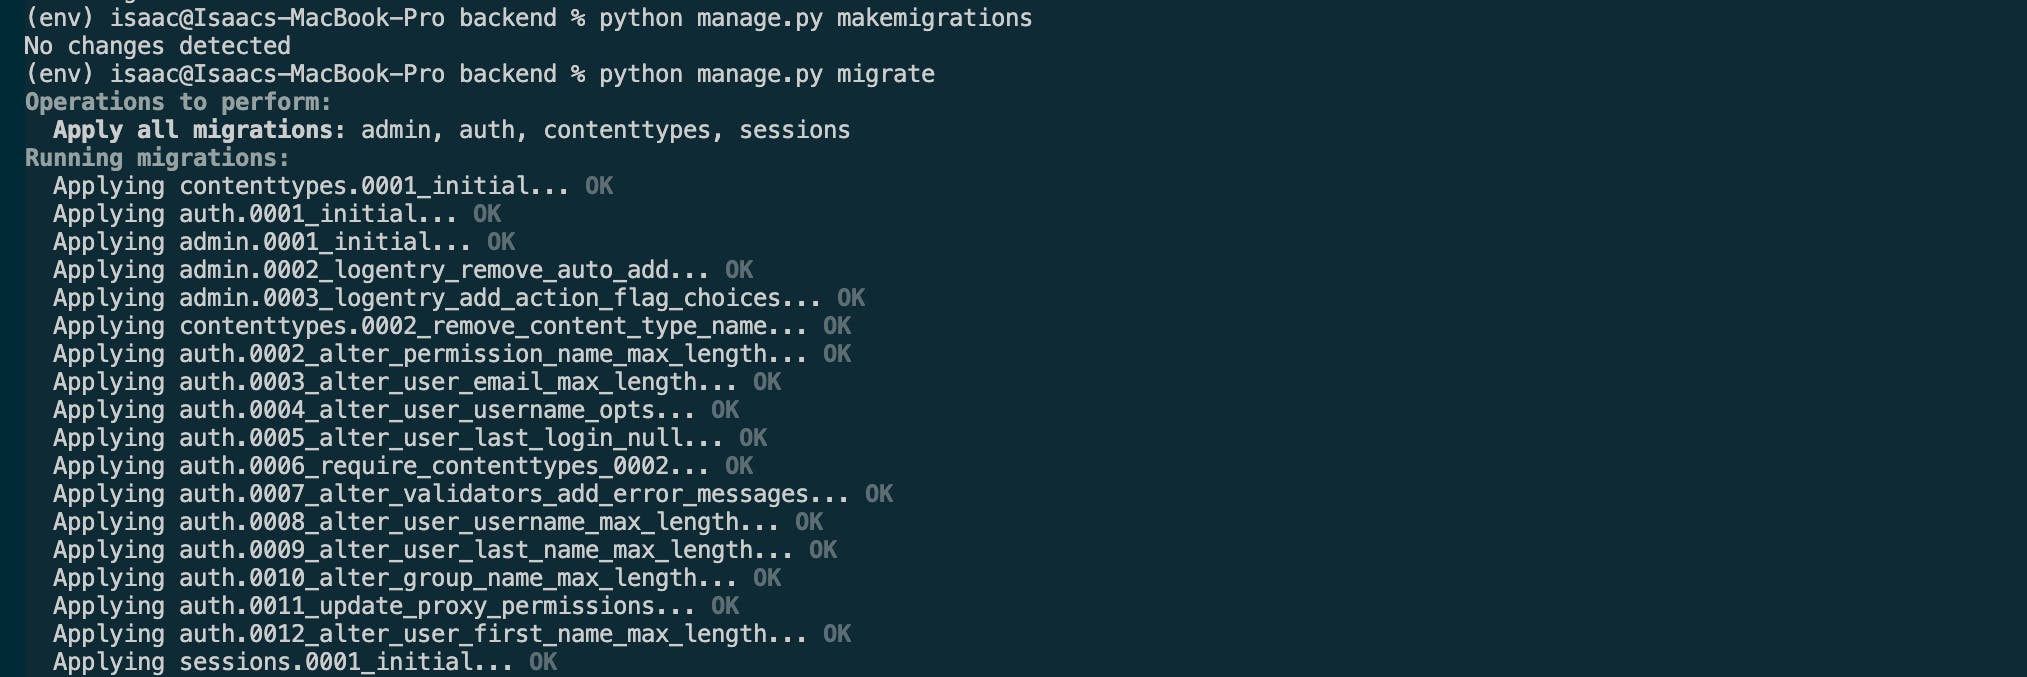
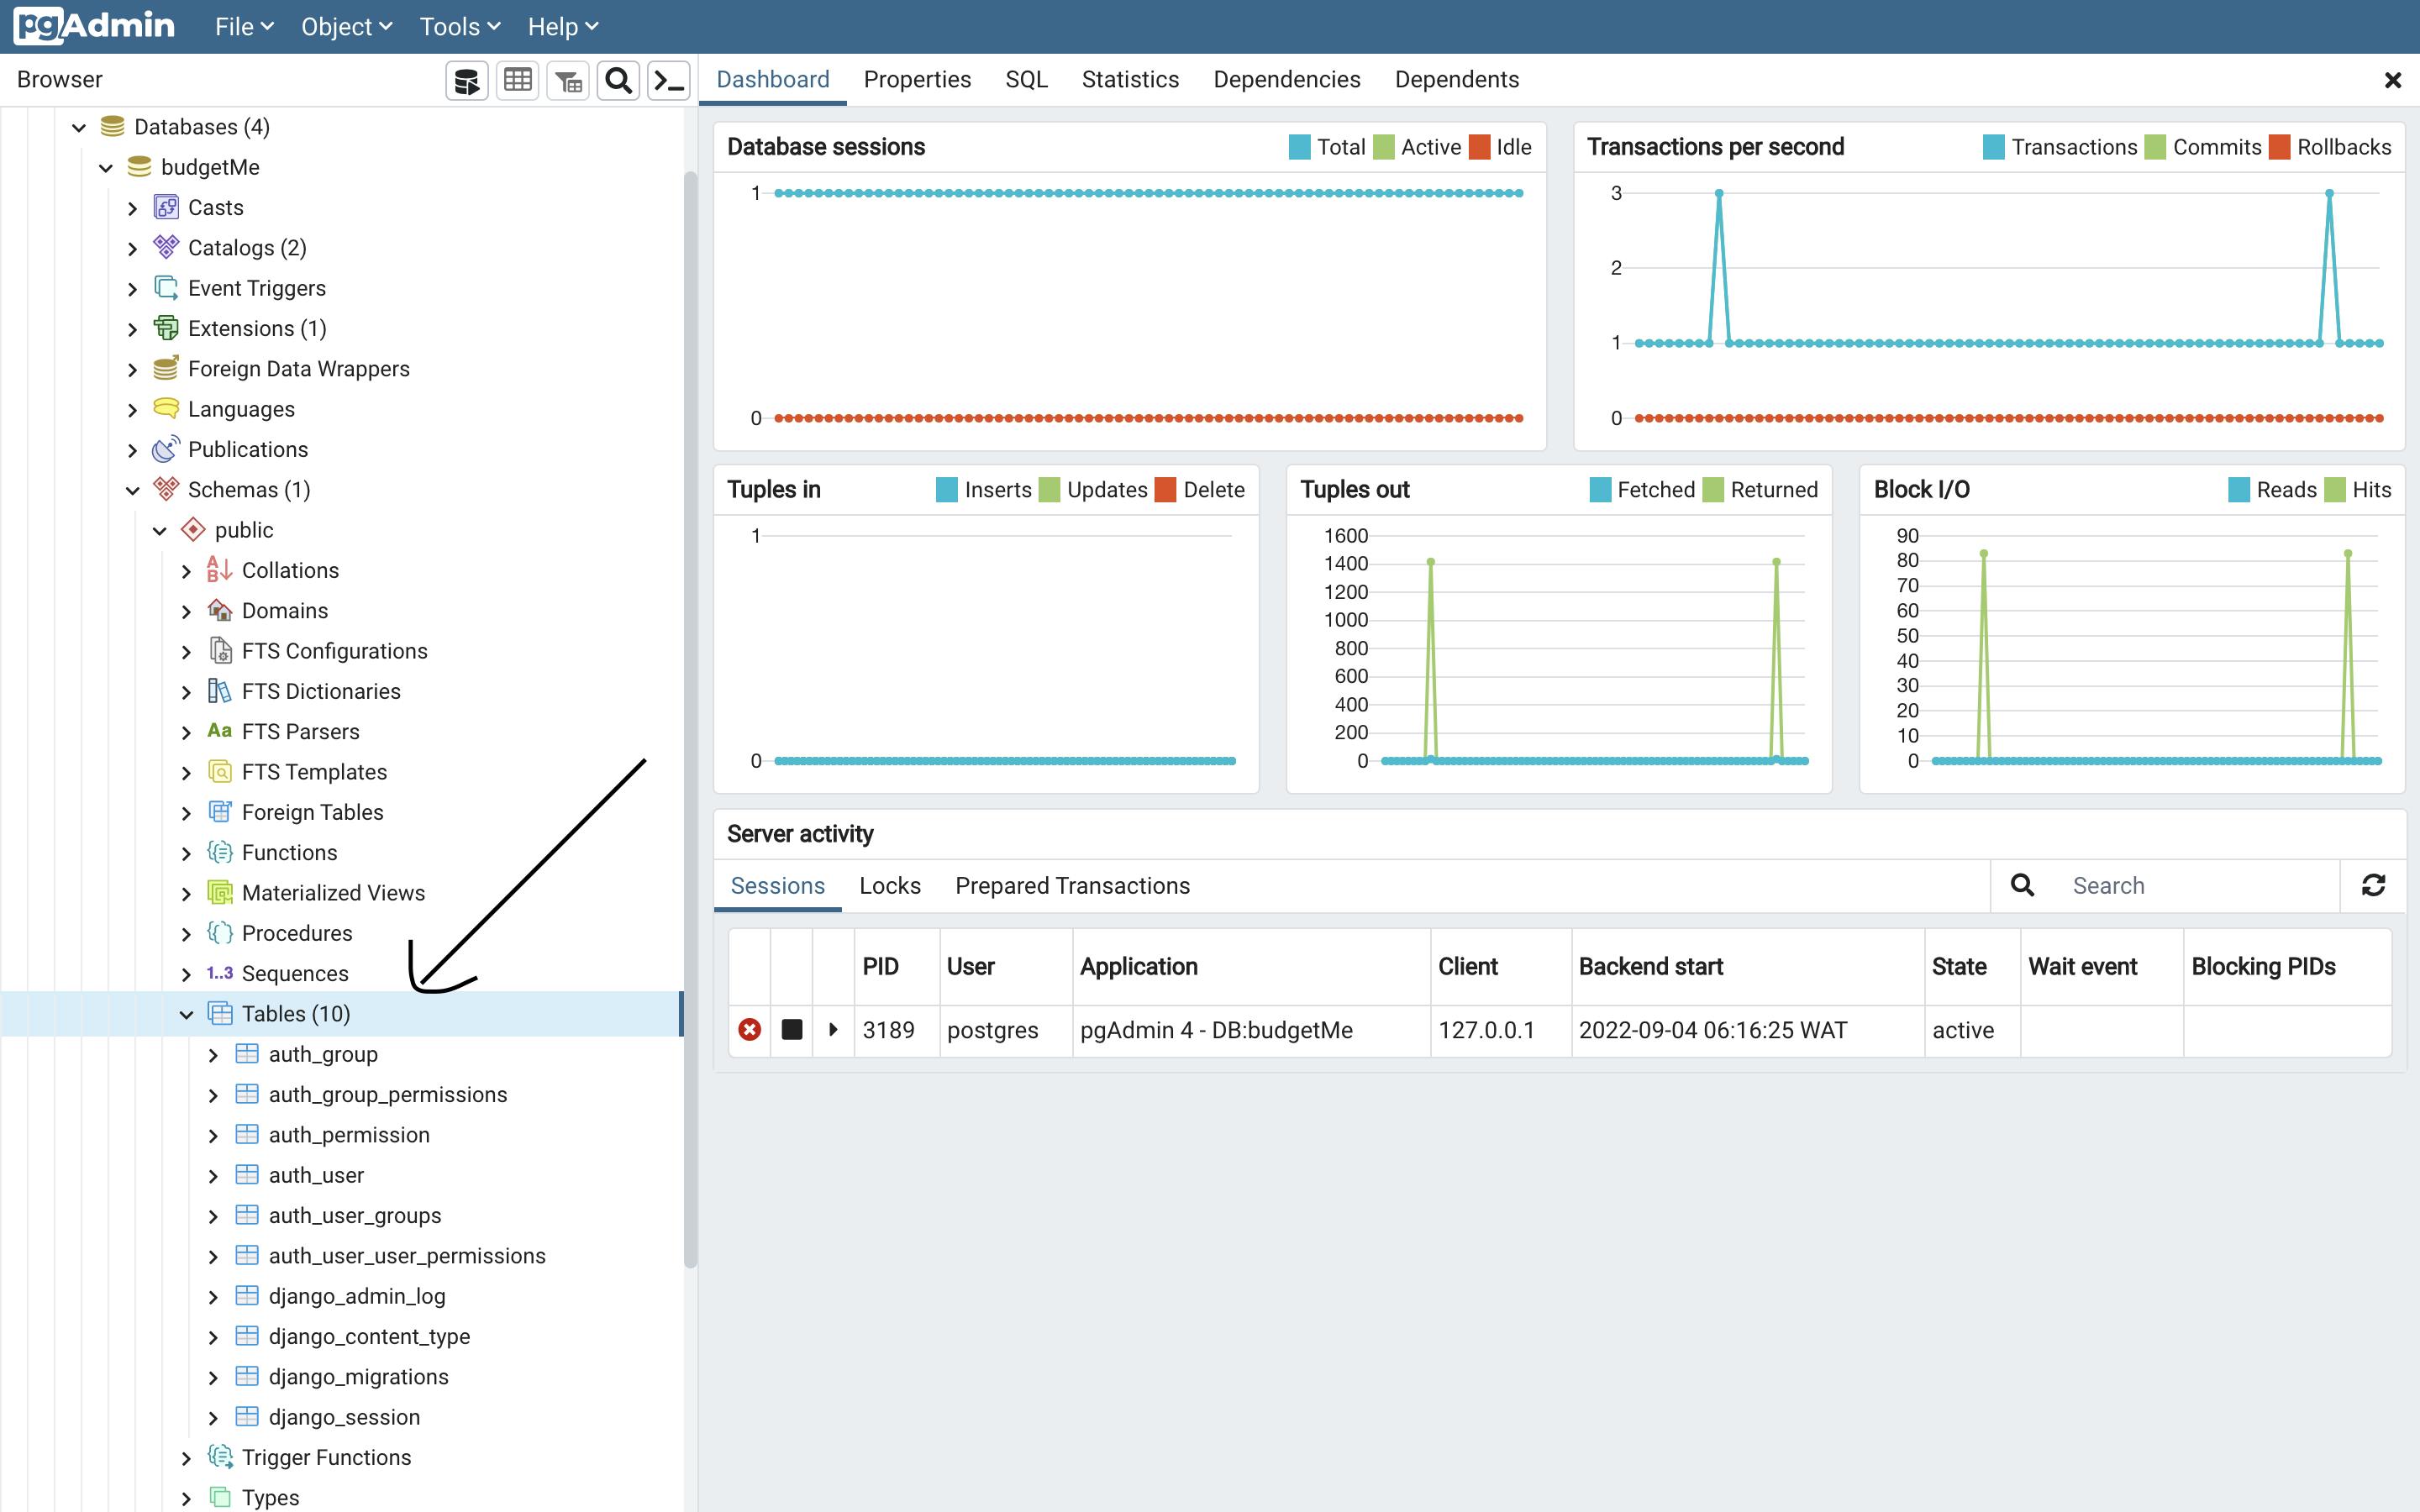
Congratulations!! You have successfully created your django project with postgreSQL, and you should be able to see all the default tables django gave us in pgAdmin4 by going to Database >budgetMe > Schemas > public > Tables.
If you have been able to make it this far down the article drop an '👀' emoji in the comments and I would reply with a '🙃💕 ' emoji to confuse people in the comment section 😂.
Implementing Environment Variables in Django
When building a web application there are certain things you would not want to push to production or a version control like git for people to see - for example, API keys, API secrets and database names. We secure these secrets using environment variables. Environment variables are variables you store outside of your program that can affect how it runs. Let's see how we can implement environment variables in our web application.
- Add the following lines of code to the top folder of your
settings.pyfile:
budgetMe
    backend/
        backend/
            __init__.py
            settings.py *
            urls.py
            asgi.py
            wsgi.py
        manage.py
    env
    requirements.txt
from dotenv import load_dotenv
import os

load_dotenv()
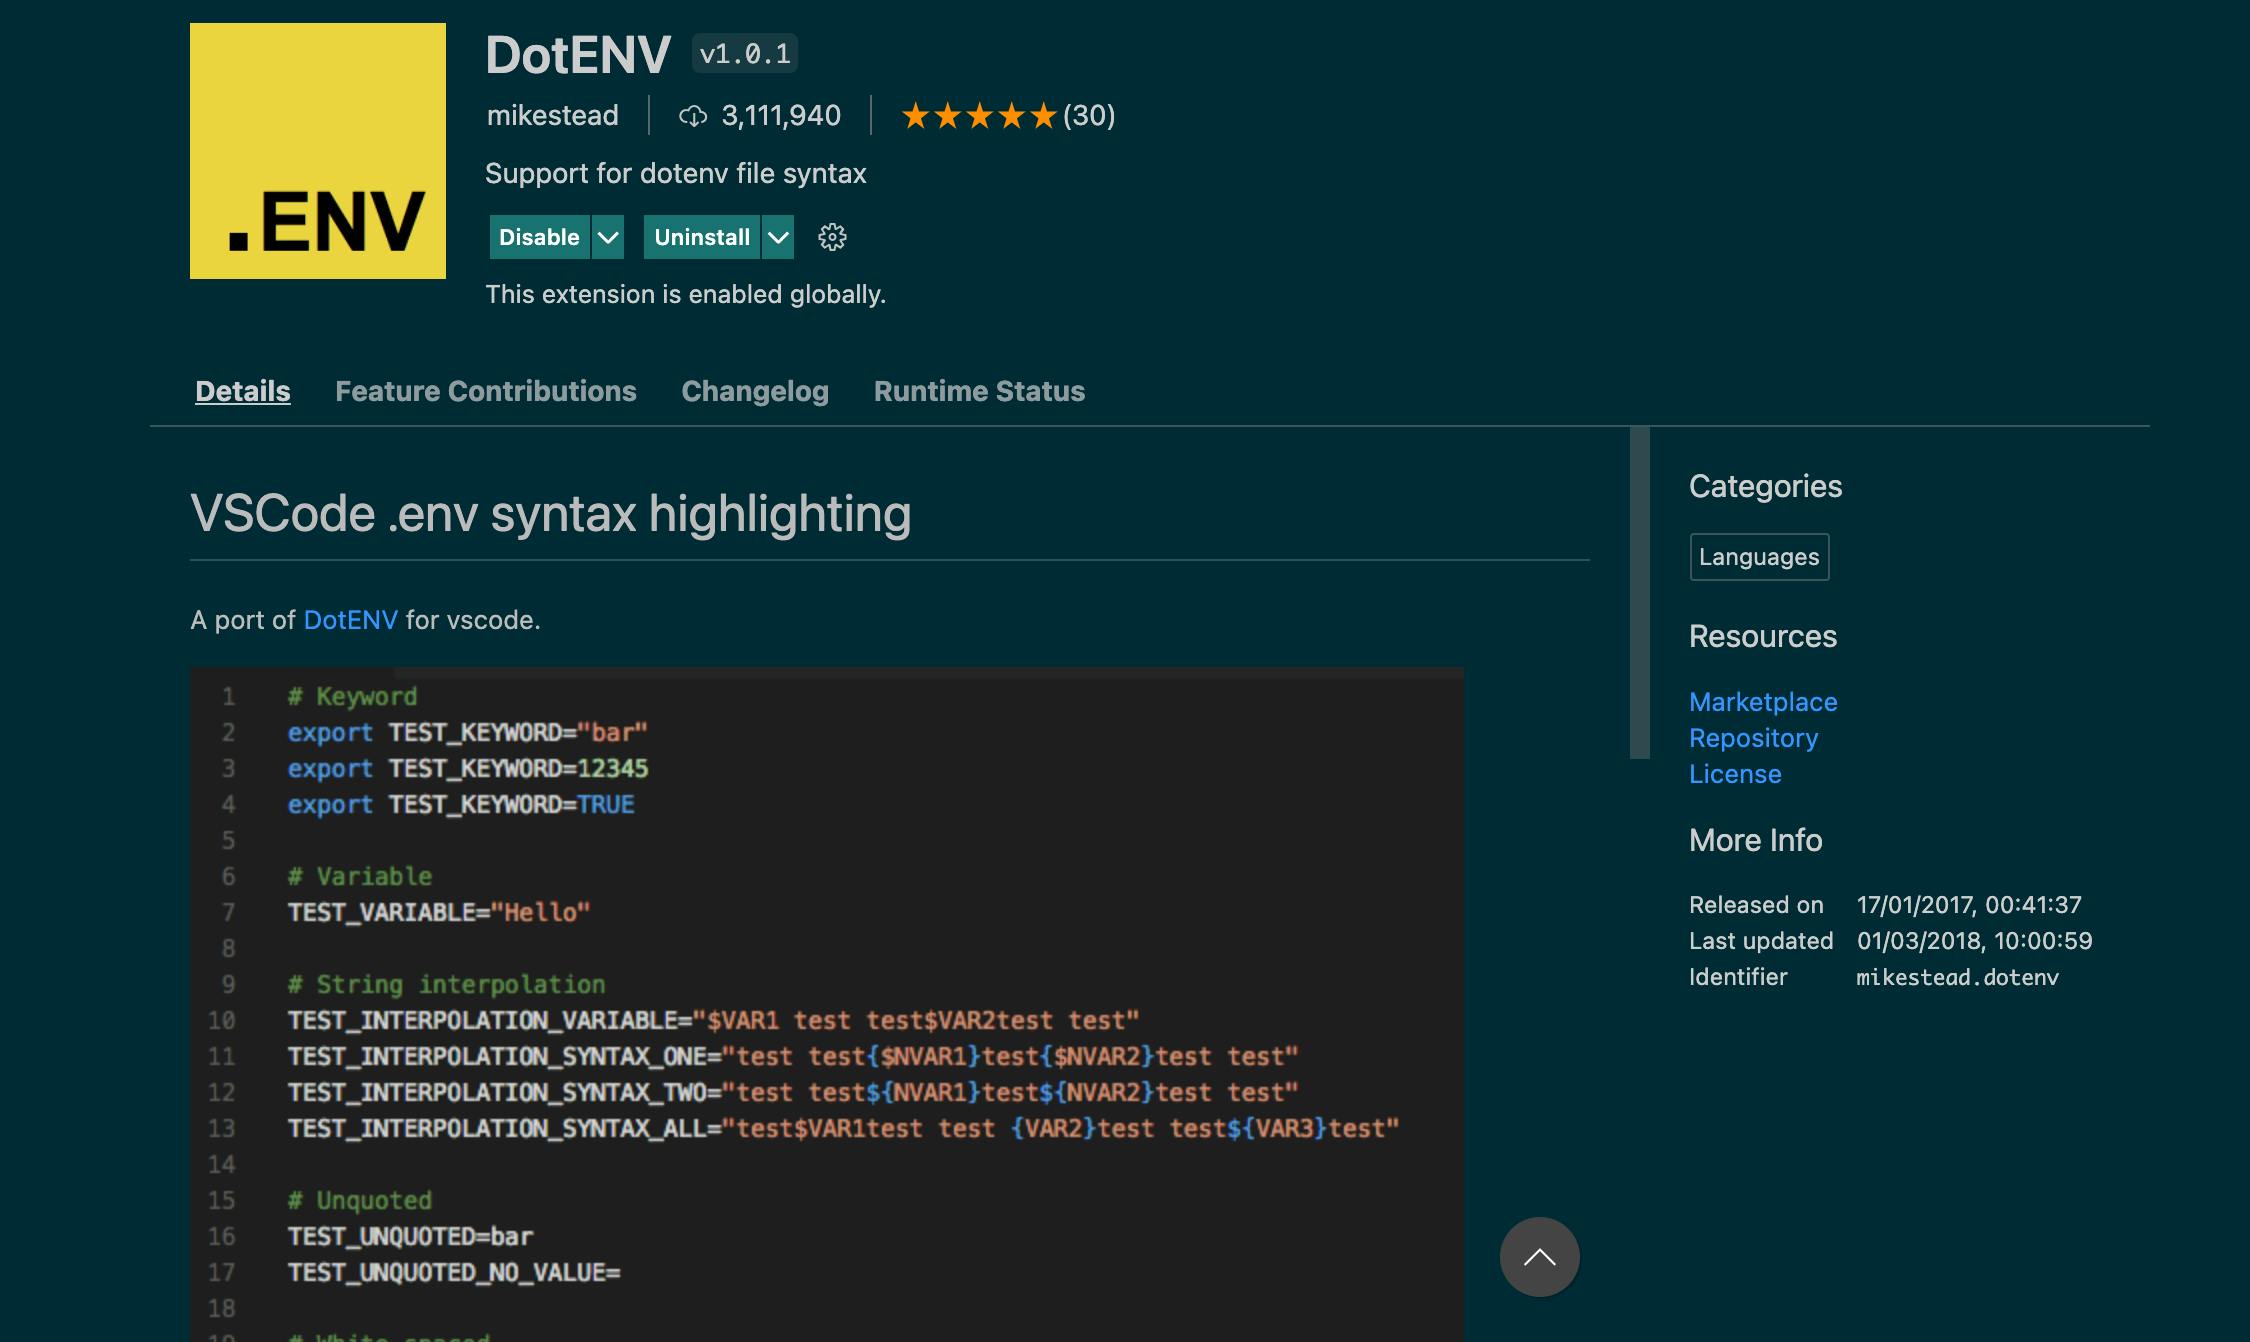
- Install the DotENV extension which supports dotenv file syntax.
- create your .env file in the budgetMe/backend directory.
// command for creating a file in your terminal on macOS
touch .env

// command for creating a file in your terminal on windows
type nul > .env
Storing your Environment Variables in your .env file:
export SECRET_KEY = "<your settings secret key line 16>"

export PASSWORD = "<your database password>"
- Implementing your environment variables.
// line 16
. . .

SECRET_KEY = os.environ.get('SECRET_KEY')

. . .

// line 69
. . .

DATABASES = {
    'default': {
        'ENGINE': 'django.db.backends.postgresql_psycopg2',
        'NAME': 'budgetMe',
        'USER': 'postgres',
        'PASSWORD': os.environ.get('PASSWORD'),
        'HOST': '127.0.0.1',
        'PORT': '5432',
    }
}

. . .
- Testing: To make sure we did not break anything and the server is still working run
python manage.py runserver.
Creating our API endpoints with Django Rest Framework
Django Rest Framework(DRF) is a powerful and flexible toolkit that allows developers to create web APIs easily and seamlessly with Django.
User Registration with Django Rest Framework
Creating our authentication app
python manage.py startapp authentication
Your app directory should now look like this :
budgetMe
    backend/
        authentication/
            migrations
            __init__.py
            admin.py
            apps.py
            models.py
            tests.py
            views.py
         backend
         .env
        manage.py
    env
    requirements.txt
Creating our serializers .py file inside our authentication app folder
Serializers in Django REST Framework are responsible for converting objects into data types understandable by javascript and front-end frameworks such as react, svelte, and vue.
backend> authentication > serializers .py
from rest_framework import serializers
from django.contrib.auth.models import User


class UserSerializer(serializers.ModelSerializer):
    password = serializers.CharField(
        max_length=65, min_length=6, write_only=True)
    email = serializers.EmailField(max_length=255, min_length=4)
    username = serializers.CharField(
        max_length=255, min_length=2)

    class Meta:
        model = User
        fields = ['username', 'email', 'password'
                  ]

    def validate(self, attrs):
        email = attrs.get('email')
        username = attrs.get("username")
        if User.objects.filter(email=email).exists():
            raise serializers.ValidationError(
                {'email': ('Email is already in use')})
        if User.objects.filter(username=username).exists():
            raise serializers.ValidationError(
                {"username": (
                    "Hey! looks like this username is taken. Please try another ")}
            )
        return super().validate(attrs)

    def create(self, validated_data):
        return User.objects.create_user(**validated_data)
Code Walkthrough:
from rest_framework import serializers
from django.contrib.auth.models import User
from rest_framework import serializers: This imports the "serializers" class from the rest_framework package.from django.contrib.auth.models import User: This imports the User model that comes with a lot of built-in functions such as username, email, last_name, password, is_active, is_superuser, last_login, etc. The User model class ensures that we do not spend time recreating the proverbial wheel and focus on working on more complex features.
. . .

class UserSerializer(serializers.ModelSerializer):
    password = serializers.CharField(
        max_length=65, min_length=6, write_only=True)
    email = serializers.EmailField(max_length=255, min_length=4)
    username = serializers.CharField(
        max_length=255, min_length=2)

    class Meta:
        model = User
        fields = ['username', 'email', 'password'
                  ]

. . .
class UserSerializer(serializers.ModelSerializer):: The ModelSerializer class acts as a layer of abstraction over the default serializer that allows you to easily create a serializer class with fields that correspond to model fields. For this use case, the fields are password, email, and username.
The password is set to
write_only = Trueto make sure the client can not read the password
class Meta:: The model Meta is the inner class of your model class. It is used to change the behaviour of your fields like changing the fields that should be rendered, the verbose_name etc. We used to class Meta to set our model to the User model and to select the fields that should be sent to the client-side (by default, all the fields created would be passed to the client-side).def validate (self, attrs ):: This function overrides the default validate method provided to us. The function checks whether the username or email already exists and returns a human-readable error if it does.
        if User.objects.filter(email=email).exists():
            raise serializers.ValidationError(
                {'email': ('Email is already in use')})

        if User.objects.filter(username=username).exists():
            raise serializers.ValidationError(
                {"username": (
                    "Hey! looks like this username is taken. Please try another ")}
            )
def create(self, validated_data):: If the data being passed is valid then it creates a new user instance.
Creating our Registration view in views.py:
backend > authentication > views .py
from rest_framework.generics import GenericAPIView
from .serializers import UserSerializer
from rest_framework.response import Response
from rest_framework import status


class RegisterView(GenericAPIView):
    serializer_class = UserSerializer

    def post(self, request):
        serializer = UserSerializer(data=request.data)

        if serializer.is_valid():
            serializer.save()
            return Response(serializer.data, status=status.HTTP_201_CREATED)

        return Response(serializer.errors, status=status.HTTP_400_BAD_REQUEST)
from rest_framework.generics import GenericAPIView: This imports the GenericAPIView from rest_framework.generics which allows us to write some of the most common views of data without having to repeat ourselves.from .serializer import UserSerializer: This import the UserSerializer class we created in the serializer .py filefrom rest_framework.response import Response: This imports the Response objectfrom rest_framework.responsewhich sends the server-side response to the client-side.from rest_framework import status: This imports the HTTP status codes that are sent client side to know the state of the response. Examples of status codes:
100 Continue
101 Switching Protocols
103 Early Hints
200 OK
201 Created
202 Accepted
204 No Content
205 Reset Content
301 Moved Permanently
304 Not Modified
307 Temporary Redirect
308 Permanent Redirect
400 Bad Request
401 Unauthorized
402 Payment Required
403 Forbidden
404 Not Found
405 Method Not Allowed
406 Not Acceptable
407 Proxy Authentication Required
408 Request Timeout
409 Conflict
413 Payload Too Large
414 URI Too Long
415 Unsupported Media Type
426 Upgrade Required
429 Too Many Requests
451 Unavailable For Legal Reasons
500 Internal Server Error
502 Bad Gateway
503 Service Unavailable
504 Gateway Timeout
505 HTTP Version Not Supported
507 Insufficient Storage
511 Network Authentication Required
def post(self, request):: This posts the data client-side.if serializer.is_valid():This runs the validate method created in theserializers.pyfile and checks whether the data that is being serialized is valid. If the data is valid then it is createdserializer.saveand returnsHTTP_201_CREATED, otherwise it returns an HTTP_400_BAD_REQUEST.
Creating our authentication URLs
The URL mapper is used to map the requests to the right views. It is usually stored in a file named urls.py.
backend > authentication > urls.py
from django.urls import path
from .views import RegisterView

urlpatterns = [
    path("/register", RegisterView.as_view(), name="register"),
]
backend > backend > urls .py
. . .

from django.urls import path, include

urlpatterns = [
    path('admin/', admin.site.urls),
    path('api/auth', include("authentication.urls"))
]
Registering our app in settings.py
backend > backend > settings.py
INSTALLED_APPS = [
    'django.contrib.admin',
    'django.contrib.auth',
    'django.contrib.contenttypes',
    'django.contrib.sessions',
    'django.contrib.messages',
    'django.contrib.staticfiles',

    'rest_framework',
    'authentication'
]
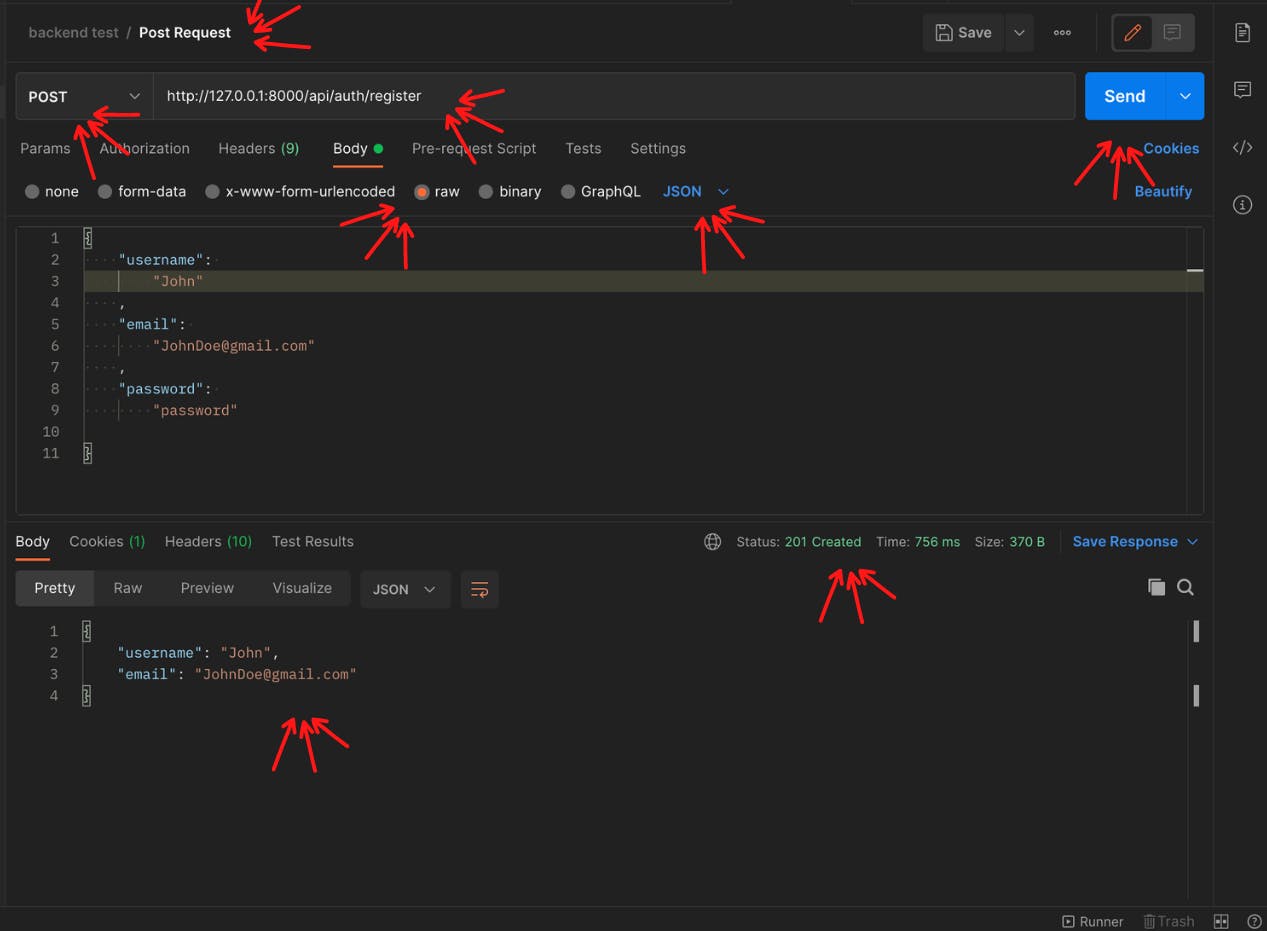
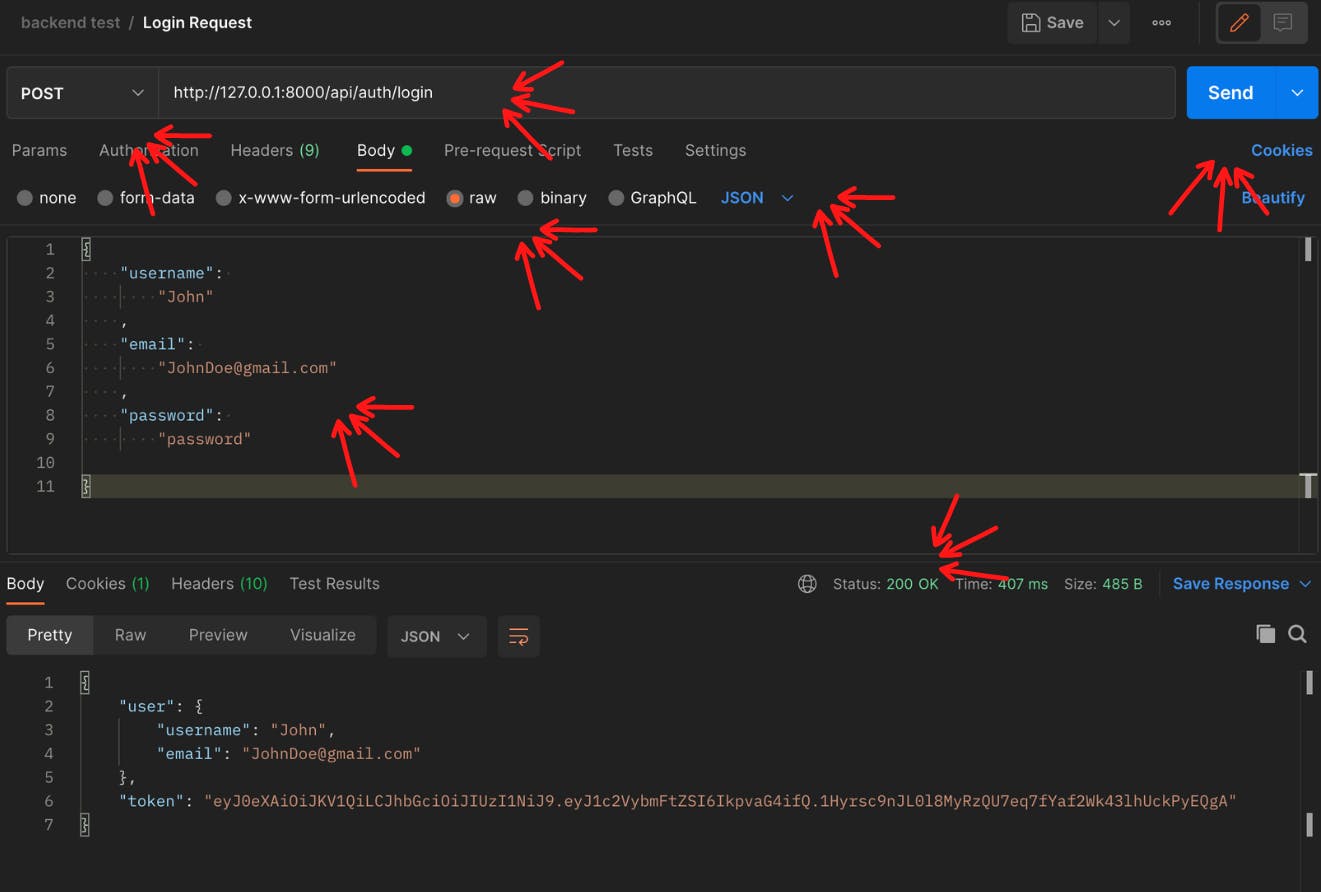
Testing our endpoints on postman
Run your server up:
python manage.py runserver.Go to postman.com/downloads and download postman if you do not have it already.
Create a new collection.
Create a new POST request.
Enter the register view URL:
http://127.0.0.1:8000/api/auth/register.Click on the body, raw and then choose the JSON Format.
Create a test user with the username, email, and password.
Then click on send to send the request.
Setting up JWT Authentication and User Login
We have been able to successfully register a user, now let us see how we can register a user using JSON Web Token (JWT) authentication.
How does JSON Web Tokens work
JSON Web Token (JWT) is an open standard (RFC 7519) that defines a compact and self-contained way for securely transmitting information between parties as a JSON object. -Official JWT documentation.
JWT can be used to authorize users to access certain routes, services, and resources that are only permitted with that token in exchange for a username and password. JSON Web Tokens consist of three parts separated by dots (header.payload.signature):
header = eyJ0eXAiOiJKV1QiLCJhbGciOiJIUzI1NiJ9

payload = eyJ0b2tlbl90eXBlIjoiYWNjZXNzIiwiZXhwIjoxNTQzODI4NDMxLCJqdGkiOiI3ZjU5OTdiNzE1MGQ0NjU3OWRjMmI0OTE2NzA5N2U3YiIsInVzZXJfaWQiOjF9

signature = Ju70kdcaHKn1Qaz8H42zrOYk0Jx9kIckTn9Xx7vhikY
- Header: The header typically consists of two parts: the type of the token, which is JWT, and the signing algorithm being used( HS256) which is encoded to form the first part of the JWT.
{
  "alg": "HS256",
  "typ": "JWT"
}
- Payload: The second part of the token is the payload, which contains the claims. Claims are statements about an entity (typically, the user) and additional data. The payload is then Base64Url encoded to form the second part of the JSON Web Token
{
  "token_type": "access",
  "exp": 1543828431,
  "jti": "7f5997b7150d46579dc2b49167097e7b",
  "user_id": 1
}
- Signature: The signature is issued by the JWT backend, using the header base64 + payload base64 + JWT_SECRET_KEY. The request is verified with each request, If any information in the header or the payload was changed by the client it will invalidate the signature. The signature is used to verify the message wasn't changed along the way, and, in the case of tokens signed with a private key, it can also verify that the sender of the JWT is who it says it is.
HS256( header base64 + payload base64 + JWT_SECRET_KEY)
Whenever the user wants to access a protected route or resource, the user agent should send the JWT, typically in the Authorization header using the Bearer schema. The content of the header should look like the following:
Authorization: Bearer <token>
For more information about JWT: jwt.io
Implementing JWT authentication in our Django Rest Framework API
- Setting up our JWT_SECRET_KEY: We need to create a secret key that can be used for our signature in our environment variables file (.env).
. . .

export JWT_SECRET_KEY = "<SECRET_KEY>" // The secret key can be anything
- Adding the JWT_SECRET_KEY and auth to our settings file:
backend > backend > settings.py
. . .
// Below line 130

JWT_SECRET_KEY = os.environ.get('JWT_SECRET_KEY')
- Create a new file in our authentication app called
jwt.pybackend > authentication > jwt .py
from sys import prefix
from coreapi import auth
from django.conf import settings
import jwt
from rest_framework import authentication, exceptions
from django.contrib.auth.models import User


class JWTAuthentication(authentication.BaseAuthentication):
    def authenticate(self, request):
        auth_data = authentication.get_authorization_header(request)

        if not auth_data:
            return None
        prefix, token = auth_data.decode('utf-8').split(' ')

        try:
            payload = jwt.decode(
                token, settings.JWT_SECRET_KEY, algorithms="HS256")

            user = User.objects.get(username=payload["username"])
            return (user, token)

        except jwt.DecodeError as identifier:
            raise exceptions.AuthenticationFailed(
                'Your token is invalid, login')

        except jwt.ExpiredSignatureError as identifier:
            raise exceptions.AuthenticationFailed(
                'Your token is expired,login')

        return super().authenticate(request)
Code Walkthrough :
class JWTAuthentication(authentication.BaseAuthentication):: Sets up the authentication schema.def authenticate(self, request):: This overrides the built-in methodauthenticateso that we can check whether we should authenticate the user or not.auth_data = authentication.get_authorization_header(request): This gets the header where the user would be sending the token.if not auth_data:: This is a check to see whether the user is supplying auth data and returnsnoneif it is not.prefix, token = auth_data.decode('utf-8').split(' '): This converts the data that is coming from a network in the byte format to a string format readable by python. Thesplitkeyword splits the prefix and token by space making sureprefixtakes the first index andtokentakes the second.Try and Except Blocks: The try and except blocks validate the token.
. . .
        try:
            payload = jwt.decode(
                token, settings.JWT_SECRET_KEY, algorithms="HS256")

            user = User.objects.get(username=payload["username"])
            return (user, token)

        except jwt.DecodeError as identifier:
            raise exceptions.AuthenticationFailed(
                'Your token is invalid, login')

        except jwt.ExpiredSignatureError as identifier:
            raise exceptions.AuthenticationFailed(
                'Your token is expired,login')

. . .
payload = jwt.decode(token, settings.JWT_SECRET_KEY, algorithms="HS256"): This gets the JWT payload, and signature then decodes the token the user provides.user = User.objects.get(username=payload["username"]): This adds the username to the token after it has been decoded.except jwt.DecodeError as identifier:: This throws an error if the token is invalid or has been tampered withexcept jwt.ExpiredSignatureError as identifier:: This throws an error if the token has expired.
Setting up our Django Rest Framework to use our JWT Authentication Scheme for all Authentication purposes.
To make sure our API uses our authentication Schema we need to add it to our settings.py file:
backend > backend > settings.py
. . .

// below line 48

REST_FRAMEWORK = {
    'DEFAULT_AUTHENTICATION_CLASSES': (
        'authentication.jwt.JWTAuthentication',
    )
}

. . .
Creating our login view
backend > authentication > views.py
from django.shortcuts import render
from rest_framework.generics import GenericAPIView
from .serializers import UserSerializer, LoginSerializer
from rest_framework.response import Response
from rest_framework import status
from django.contrib import auth
from django.conf import settings
import jwt

. . .

class LoginView(GenericAPIView):

    def post(self, request):
        data = request.data
        username = data.get("username", "")
        password = data.get("password", "")

        user = auth.authenticate(username=username, password=password)

        if user:
            auth_token = jwt.encode(
                {"username": user.username}, settings.JWT_SECRET_KEY, algorithm="HS256")

            serializer = UserSerializer(user)

            data = {'user': serializer.data, 'token': auth_token}
            return Response(data, status=status.HTTP_200_OK)

        return Response({'detail': 'Invalid credentials, please try again'}, status=status.HTTP_401_UNAUTHORIZED)
user = auth.authenticate(username=username, password=password): This gets the user credentials.This encodes the user credentials and generates a token if the user exists:
. . .

        if user:
            auth_token = jwt.encode(
                {"username": user.username}, settings.JWT_SECRET_KEY, algorithm="HS256")

            serializer = UserSerializer(user)

            data = {'user': serializer.data, 'token': auth_token}
            return Response(data, status=status.HTTP_200_OK)

. . .
Mapping our Login view to our URL
from django.urls import path
from .views import RegisterView, LoginView

urlpatterns = [
    path("/register", RegisterView.as_view(), name="register"),
    path("/login", LoginView.as_view(), name="register")
]
Testing our Login View with Postman
Implementing CRUD Operations in Django Rest Framework
Create and Register your app
python manage.py startapp expense
backend> backend > settings.py
. . .

INSTALLED_APPS = [
    'django.contrib.admin',
    'django.contrib.auth',
    'django.contrib.contenttypes',
    'django.contrib.sessions',
    'django.contrib.messages',
    'django.contrib.staticfiles',

    'rest_framework',
    'authentication',
    'expense'
]

. . .
Creating the app model
This model would be representing all the information about your expense
from django.db import models
from django.contrib.auth.models import User


class Expense(models.Model):

    CATEGORY_OPTIONS = [
        ('ONLINE_SERVICES', 'ONLINE_SERVICES'),
        ('TRAVEL', 'TRAVEL'),
        ('FOOD', 'FOOD'),
        ('RENT', 'RENT'),
        ('ENTERTAINMENT', 'ENTERTAINMENT'),
        ("BILLS", "BILLS"),
        ('OTHERS', 'OTHERS')
    ]

    category = models.CharField(choices=CATEGORY_OPTIONS, max_length=255)
    amount = models.DecimalField(
        max_digits=10, decimal_places=2, max_length=255)
    description = models.TextField()
    owner = models.ForeignKey(to=User, on_delete=models.CASCADE)
    date = models.DateField(null=False, blank=False)
    created_at = models.DateTimeField(auto_now_add=True)
    updated_at = models.DateTimeField(auto_now=True)

    class Meta:
        ordering: ['-updated_at']

    def __str__(self):
        return str(self.owner)+'s income'
Code Walkthrough:
owner = models.ForeignKey(to=User, on_delete=models.CASCADE): This checks who owns the expense.on_delete=models.CASCADEdefines what happens when the user's account is deleted. In our case all the user's information is deleted when their account is deleted.category = models.CharField(choices=CATEGORY_OPTIONS, max_length=255): This shows the choices category can be.
Creating the serializer file
backend > expense > serializers.py
from rest_framework import serializers
from .models import Expense


class ExpenseSerializer(serializers.ModelSerializer):

    class Meta:
        model = Expense
        fields = ['id', 'date', 'description', 'amount', 'category']
Creating the app view
from django.shortcuts import render
from rest_framework.generics import ListCreateAPIView, RetrieveUpdateDestroyAPIView
from .serializers import ExpenseSerializer
from .models import Expense
from rest_framework import permissions
from rest_framework.views import APIView
from rest_framework import response
from django.db.models import Sum


class ExpenseListAPIView(ListCreateAPIView):
    serializer_class = ExpenseSerializer
    queryset = Expense.objects.all()
    permission_classes = (permissions.IsAuthenticated,)

    def perform_create(self, serializer):
        return serializer.save(owner=self.request.user)

    def get_queryset(self):
        return self.queryset.filter(owner=self.request.user)


class ExpenseDetailAPIView(RetrieveUpdateDestroyAPIView):
    serializer_class = ExpenseSerializer
    permission_classes = (permissions.IsAuthenticated,)
    queryset = Expense.objects.all()
    lookup_field = "id"

    def get_queryset(self):
        return self.queryset.filter(owner=self.request.user)


class TotalExpenseStats(APIView):
    def get(self, request):
        expenses = Expense.objects.filter(owner=request.user)
        total_amount = expenses.aggregate(Sum("amount"))
        return response.Response(total_amount)
Code Walkthrough:
class ExpenseListAPIView(ListCreateAPIView):: Creates a View that allows users to list and create expenses.permission_classes = (permissions.IsAuthenticated,): This makes sure the user querying and posting the expenses is authenticated.def perform_create(self, serializer):: This overrides theperform_createmethod so that only authenticated users can create expenses and the owner of the expense is the current logged-in user.def get_queryset(self):: This overrides theget_querysetmethod so that the user can only query their expenses.class ExpenseDetailAPIView(RetrieveUpdateDestroyAPIView):: Creates a view that allows users to retrieve, update and delete an expense.lookup_field = "id": This views a single expense that is uniquely identified by their id eg /expense/1.total_amount = expenses.aggregate(Sum("amount")): This adds all the expenses that belongs to the user.
Mapping our views to a URL
from django.urls import path
from .views import ExpenseDetailAPIView, ExpenseListAPIView


urlpatterns = [
    path('', ExpenseListAPIView.as_view()),
    path('<int:id>/', ExpenseDetailAPIView.as_view()),
    path("total-expense/", TotalExpenseStats.as_view(),
         name="total-expense-stats"),
]
Migrating our app models to postges and running our server
python manage.py makemigrations
python manage.py migrate
python manage.py runserver
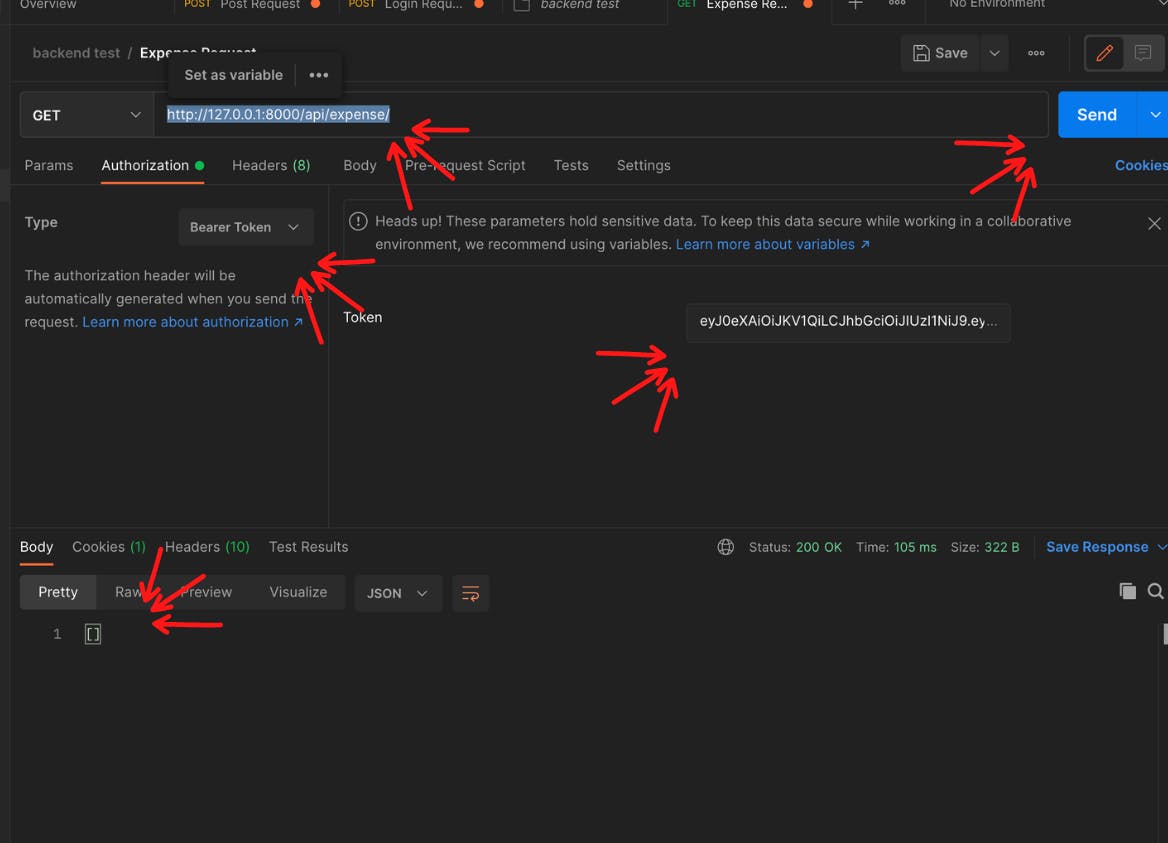
Testing our app with postman
Create a new Get Request and enter
http://127.0.0.1:8000/api/expense/URLClick on authorization and choose Bearer Token
Input your login token to the token field
Send the request
Congratulations 🥳 , you have created an app with full Crud Operations, and Authentication that is connected to a PostgreSQL database! All that is left now is documenting our API with Swagger UI and redoc and you would have created a full-featured API 😁. I am pretty excited, I hope you are too.

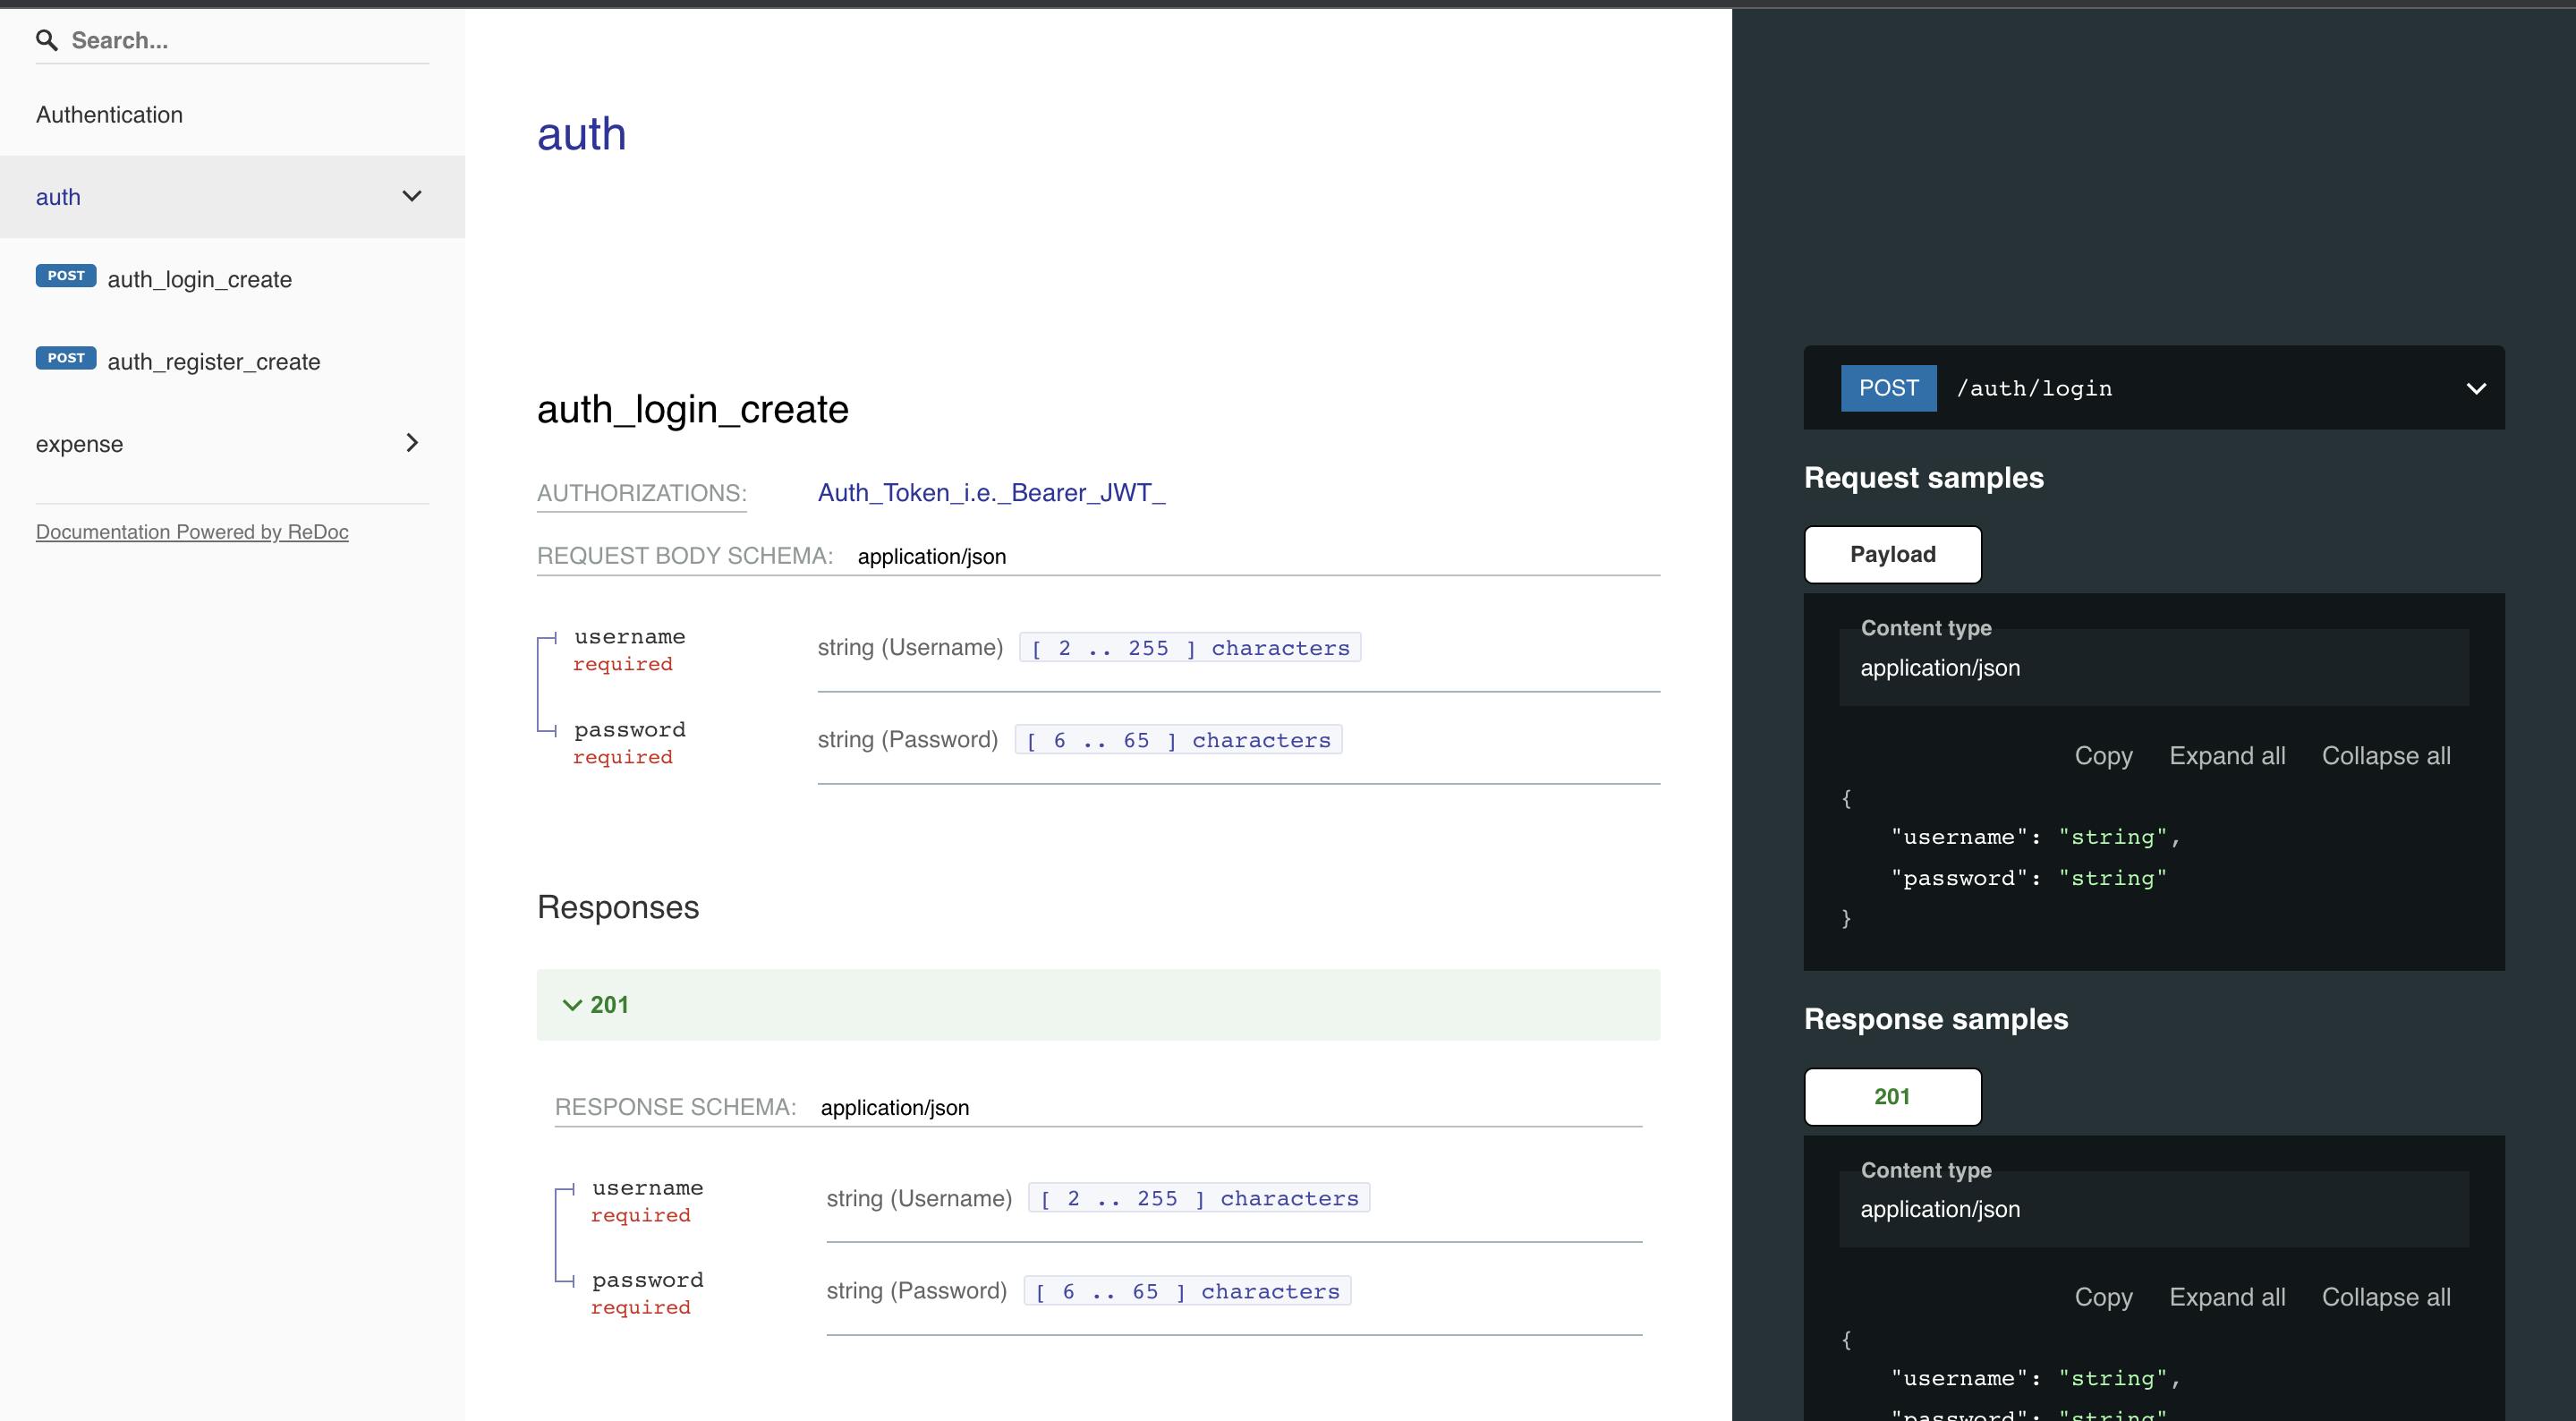
API Documentation with Swagger UI/Redoc
API documentation is technical content that documents the API. It includes instructions on how to effectively use and integrate the API. It also provides updates on the API’s lifecycle such as new versions or retirement. Documenting our APIs is very important when working with teams, it shows the other developers especially the frontend developers how to interact with the backend without needing to know the ins and outs of the codebase.
Implementing drf_yasg
Drf_yasg is a Swagger and Redoc Automation tool for creating API documentation.
backend > backend > settings.py
INSTALLED_APPS = [
   . . .

   'drf_yasg',
   . . .
]
Adding Swagger Settings
SWAGGER_SETTINGS = {
    'SECURITY_DEFINITIONS': {
        "Auth Token i.e. [Bearer (JWT) ]": {
            "type": "apiKey",
            "name": "Authorization",
            "in": "header"
        }
    }
}
Routing Swagger UI and Redoc URL
backend > backend > urls.py
from django.contrib import admin
from django.urls import path, include

from drf_yasg.views import get_schema_view
from drf_yasg import openapi

from rest_framework import permissions
schema_view = get_schema_view(
    openapi.Info(
        title="BudgetMe API",
        default_version='v1',
        description="The budget me web app official api documentation",
        terms_of_service="https://opensource.org/licenses/MIT",
        contact=openapi.Contact(email="ndubuisisaac@gmail.com"),
        license=openapi.License(name="MIT License"),
    ),
    public=True,
    permission_classes=(permissions.AllowAny,),
)


urlpatterns = [
    path('admin/', admin.site.urls),
    path('api/auth/', include("authentication.urls")),
    path('api/expense/', include('expense.urls')),


    path('', schema_view.with_ui('swagger',
                                 cache_timeout=0), name='schema-swagger-ui'),
    path("redoc", schema_view.with_ui('redoc',
                                      cache_timeout=0), name='schema-redoc'),
]
python manage.py runserver
localhost:8000
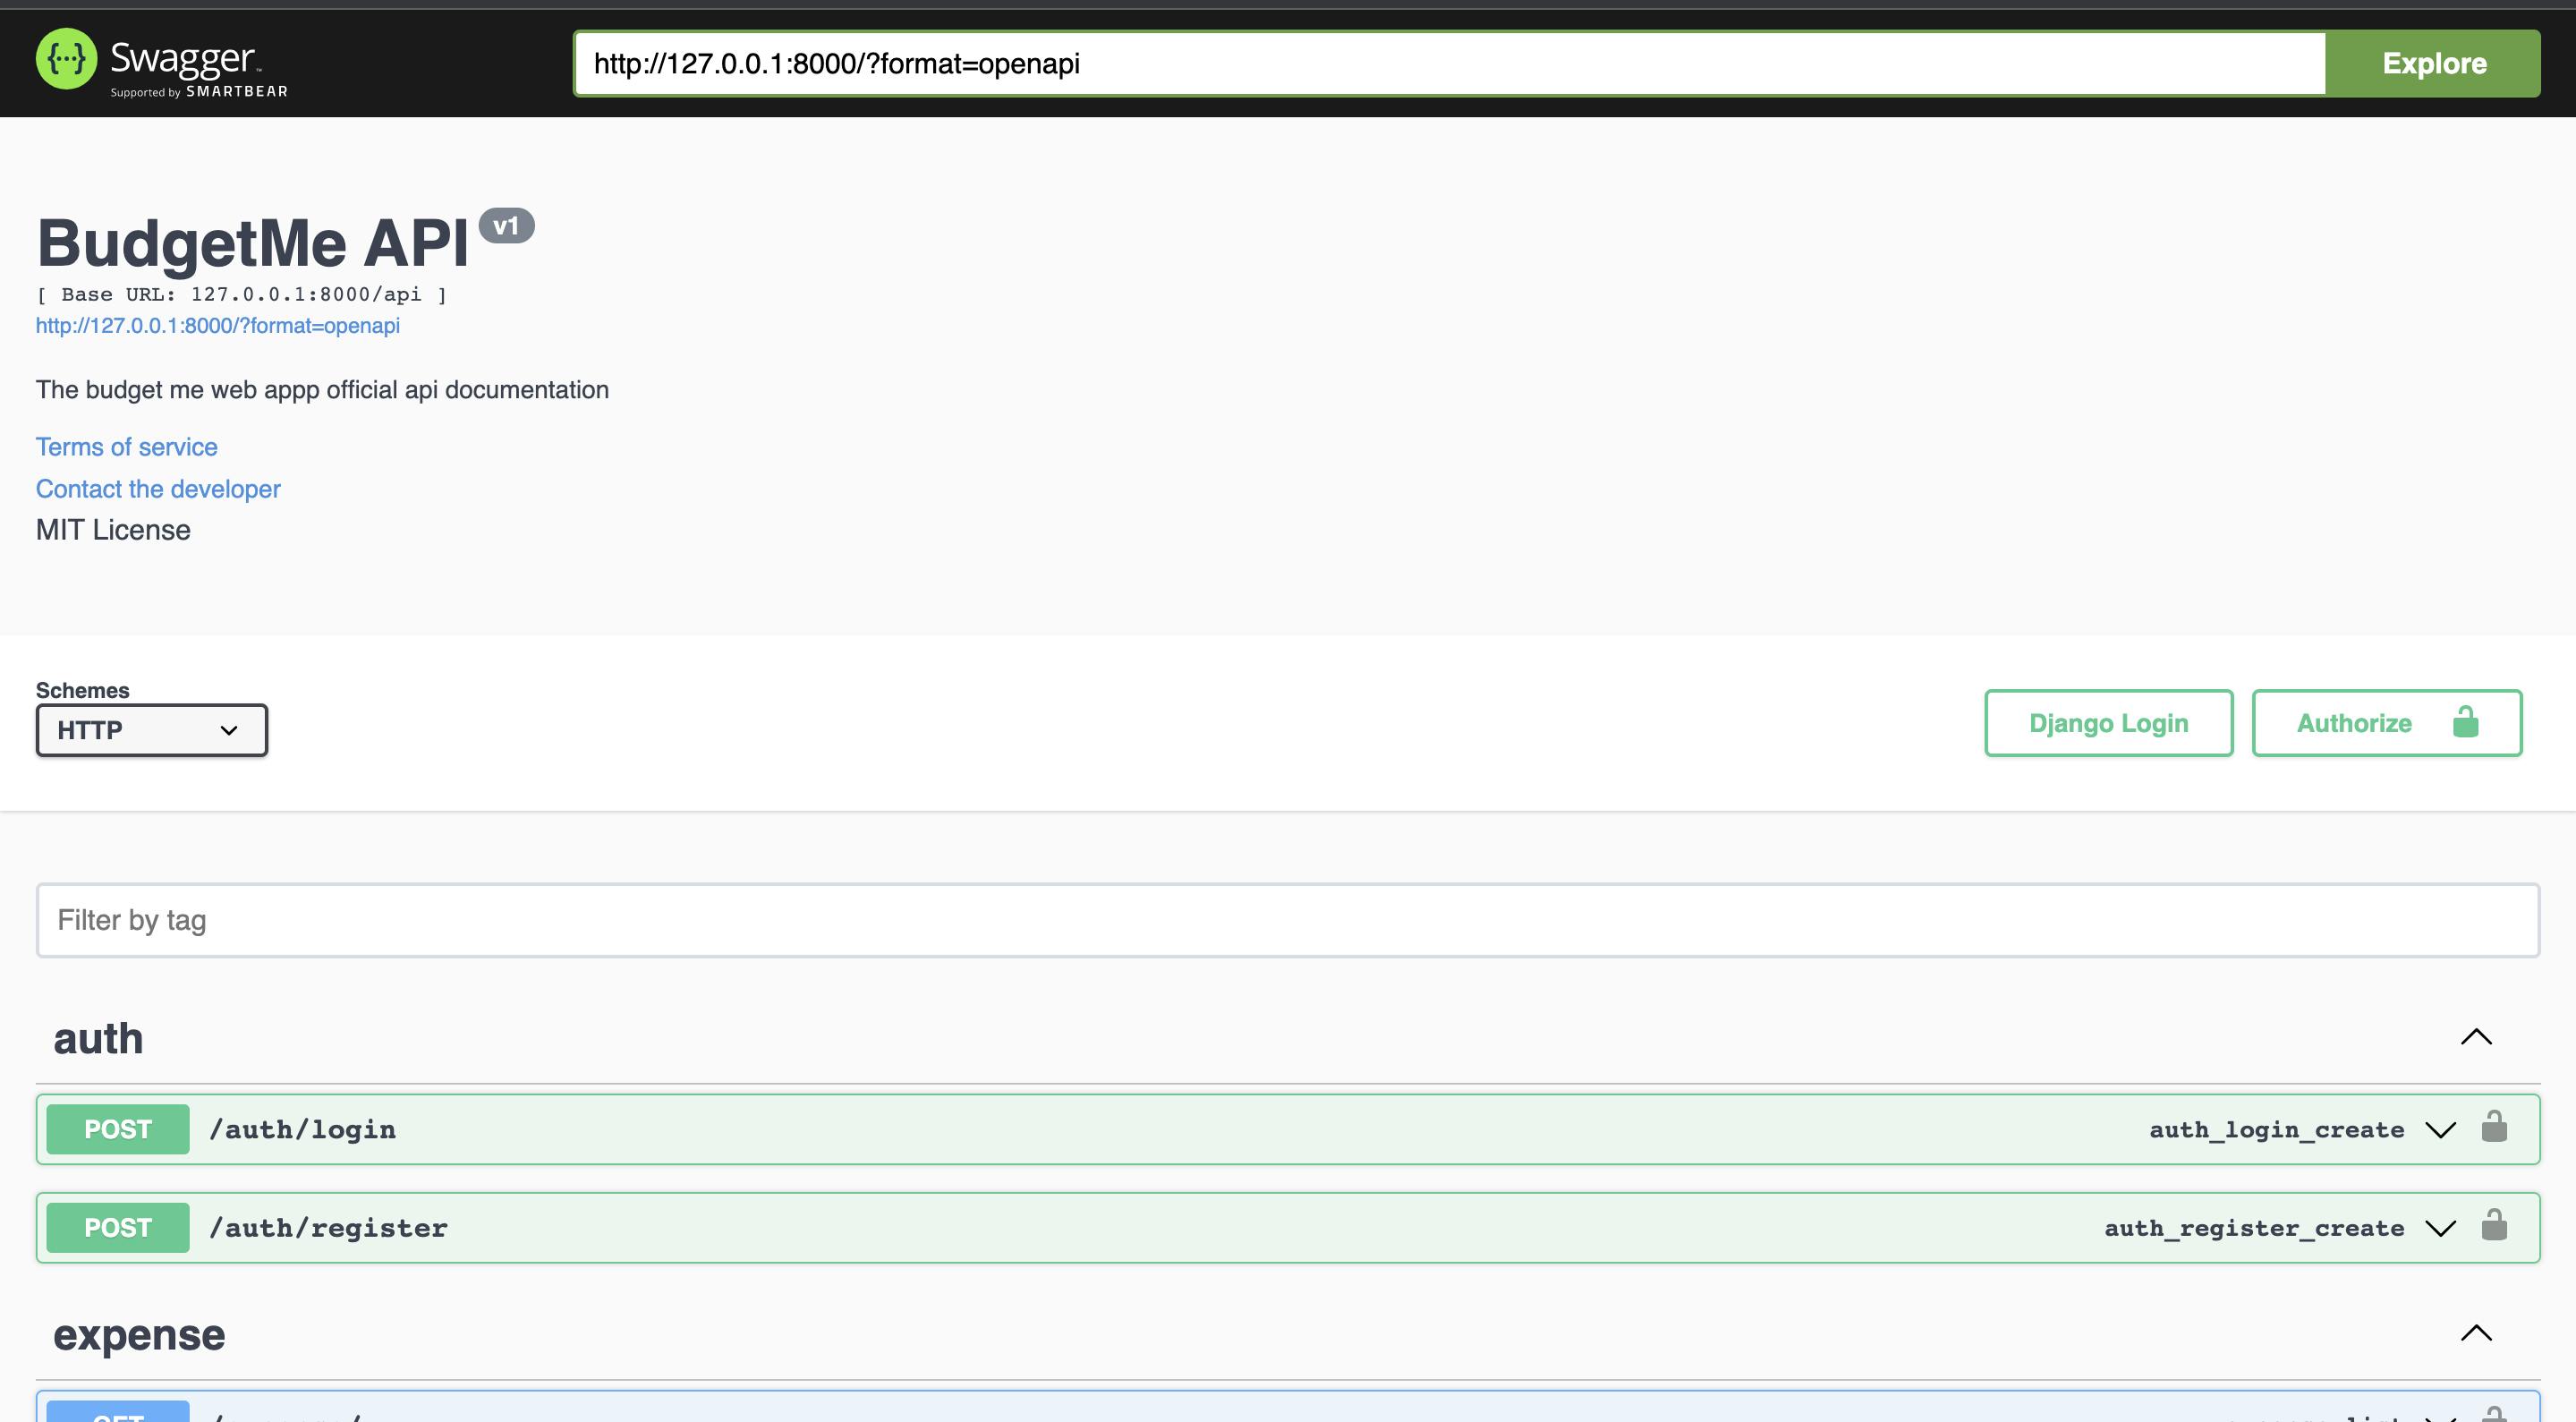
localhost8000/redoc
Conclusion (TLDR)

We have been able to see the power of Django Rest API, creating a fully featured CRUD application with relatively very few lines of code. We set up an authentication schema using JWT and much more. If you liked this article, please like and follow me for more in-depth tutorials like this 😁. Feel free to let me know if you want an article on how to build the client-side application for an API like this, your input would be very much appreciated :). You can also reach out to me in the comment section if you come across any issues while building out the API, and I would be very happy to help you out!